Nothing beats the smell of freshly baked sourdough dinner rolls wafting through your kitchen! Perfect for feeding a crowd, these rolls are soft, buttery, and just a little tangy thanks to your fed starter. Best part? They’re easy to make, and you can do most of the work in a stand mixer. I am in charge this year of rolls and have at least 30 people to provide bread for! This is my easy go-to recipe for massive baking!
Yield: This recipe makes approximately 24–28 rolls (depending on size).
Ingredients (Massive Batch):
240 g fed sourdough starter (1 cup)
7 g active dry yeast (2 ½ tsp)
240 ml warm water (1 cup)
100 g sugar (½ cup)
9 g salt (1 ½ tsp)
115 g butter, melted + extra for brushing (½ cup)
720 g all-purpose flour (6 cups, approx.)
Directions:
Activate yeast: In your mixer bowl, combine warm water, sugar, and yeast. Let sit 5–10 minutes until foamy.
Mix dough: Add fed starter, melted butter, salt, and 480 g (about 4 cups) of flour. Using the dough hook, mix on low until combined, then gradually add more flour until dough is soft but not sticky.
First rise: Cover the bowl with a clean towel or plastic wrap. Let rise about 2 hours until doubled in size.
Shape rolls: Punch down the dough and divide into small balls (roughly 50–60 g each, golf-ball size). Place on greased or parchment-lined baking sheets.
Second rise: Cover and let rolls rise again for 30–45 minutes until puffy.
Bake: Preheat oven to 190°C (375°F). Brush rolls with melted butter and bake 20–25 minutes, until golden brown. Optional: brush again with butter immediately after baking for extra softness.
Enjoy! Serve warm with butter, soups, or your favorite dinner dishes.
Tips for success:
Make sure your starter is fed and active for the best rise.
Don’t skip the second rise—it makes your rolls fluffy and soft.
Feel free to add herbs or garlic butter for a fun twist!
These rolls disappear fast at any table. Big family dinner? Holiday feast? Or just a cozy weekend treat—they’re guaranteed to bring smiles.
Happy baking, and don’t forget to save one for yourself!
The holidays often bring pressure to buy more, spend more, and fill our carts with things that don’t always hold lasting meaning. Yet some of the most cherished gifts are the ones made by hand — crafted with time, thought, and love.
It’s time to normalize the beauty of homemade gifts. Not because they’re cheaper or easier, but because they hold something money can’t buy: presence and intention.
The Heart Behind Homemade
When we take the time to make something for someone, we infuse it with care. It’s a quiet way of saying, “You matter.” Whether it’s a loaf of bread, a handwritten note, or a jar of bath salts, each handmade offering carries a little piece of your heart.
Homemade gifts remind us that love doesn’t come from the store — it comes from our hands, our creativity, and our willingness to give meaningfully. Neighbors, teachers, friends, and family can all enjoy timeless gifts that are made from the heart.
Simple Homemade Gift Ideas
Here are a few thoughtful, easy ideas that invite creativity and connection:
1. Essential Oil Blends or Sprays Mix your favorite oils into a simple roller blend or room spray. Try combinations like wild orange and clove for comfort, or lavender and frankincense for calm. Add a handwritten note with the emotional benefits or a short affirmation.
2. Baked Goods with Intention Bake a loaf of sourdough, a batch of pumpkin bread, or scones wrapped in parchment and twine. Include a card sharing why you made that recipe — the memories it stirs or the comfort it brings.
3. Cookie Mix in a Jar Layer dry ingredients for your favorite cookie recipe in a mason jar, then attach a simple tag with baking instructions. Add festive ribbon and a handwritten message like “Made with love and sweet memories.”
4. Homemade Bath Salts or Body Scrubs Combine Epsom salt, a few drops of essential oils, and dried herbs like lavender or rosemary. Package them in a glass jar with a simple label that reads “for slowing down.”
5. Potpourri Simmer Pot Create a simmer pot mix with dried citrus slices, cinnamon sticks, and cloves. Add a little note with directions: “Simmer in a pot of water to fill your home with cozy holiday scents.”
6. Gratitude Jars or Affirmation Cards Write uplifting notes, affirmations, or reasons you’re grateful for the person. Place them in a small jar tied with ribbon — a daily reminder of how loved they are.
7. Crochet Headband or Scarf If you love crafting, crochet a simple headband or scarf in cozy winter colors. These handmade accessories are thoughtful, practical, and full of heart.
8. Tea or Spice Blends Create a signature blend of loose leaf tea or herbal infusions. You can also make custom spice mixes for cooking — a fun and personal gift for food lovers.
Why Homemade Gifts Matter
Homemade gifts invite us to slow down and give from the heart. They encourage mindfulness, creativity, and a return to simplicity.
They remind both giver and receiver that joy doesn’t come from how much we spend, but from how much love we pour into what we give.
When we choose to make something by hand, we choose meaning over material — and that’s the kind of gift that truly lasts long after the holidays have passed.
If you are looking to give some homemade gifts but aren’t crafty I can help. Check out my gift giving guide here!
Team Apple vs. Team Pumpkin: Which Fall Flavor Wins Your Heart?
Every year as the air turns crisp and the leaves begin to change, one of the great debates of fall returns: Are you Team Apple or Team Pumpkin?
Pumpkin often takes center stage this season, showing up in lattes, pies, breads, and candles everywhere you turn. But apples have been a fall favorite for centuries—whether you’re picking them fresh from an orchard, baking them into a crisp, or simply enjoying them raw, they carry a comforting sweetness that feels like home.
So which side are you on? Let’s take a closer look at why apples deserve just as much love as pumpkin this fall.
Why Apples Deserve the Spotlight
Apples are one of the most versatile fruits of the season. Their natural balance of sweet and tart makes them perfect for both savory and sweet recipes. Beyond taste, they’re also packed with fiber and vitamin C, making them a healthy addition to fall meals and snacks.
Best of all, apples carry that nostalgic sense of fall—think apple-picking at the orchard, the smell of warm cider simmering on the stove, or the crunch of a fresh apple enjoyed on a chilly afternoon.
Simple Apple Recipes to Try This Season
If you’re on Team Apple (or maybe just curious to explore beyond pumpkin spice), here are a few cozy ideas to bring more apples into your fall kitchen:
Warm Cinnamon Baked Apples – A simple dessert where apples are cored, filled with oats, nuts, cinnamon, and a touch of honey, then baked until tender.
Homemade Apple Butter – Slow-cooked apples with cinnamon, nutmeg, and cloves create a spread that’s perfect on toast, biscuits, or stirred into oatmeal.
Classic Apple Crisp – A timeless comfort food with tender baked apples topped with a golden, buttery oat crumble.
Apple and Cheddar Snack Plate – The perfect combination of sweet and savory. Crisp apple slices paired with sharp cheddar make a quick, satisfying snack.
Mulled Apple Cider – A warming drink infused with cinnamon sticks, cloves, and orange peel that fills the house with the scent of autumn.
The Case for Pumpkin
Of course, pumpkin has its own charm. It’s rich, earthy, and pairs beautifully with warm spices. Pumpkin pies, muffins, soups, and, of course, the famous pumpkin spice latte all have their place in the fall kitchen.
But perhaps the joy of fall isn’t about choosing just one—it’s about celebrating the abundance and variety the season brings. Apples and pumpkins both connect us to the rhythms of the harvest, offering nourishment, comfort, and tradition.
So, Which Team Are You?
Whether you’re sipping on spiced cider or stirring pumpkin puree into your morning oats, fall is about savoring the flavors that bring you joy. I’d love to know—are you Team Apple, Team Pumpkin, or maybe a little of both? Share your favorite fall recipes and traditions in the comments below.
Here’s to cozy kitchens, comforting flavors, and a season filled with abundance. Subscribe and follow for some fun fall recipes to come!
If you love my content and want more tools for mindfulness & movement, check out my digital products on my digital storefront!
Looking for the tools and products I swear by? Visit my Amazon storefront for a handpicked collection of my favorite finds—from kitchen gadgets to wellness essentials. Click here to explore and shop my must-haves.
Interested in being part of my essential oil community and are ready to start using pure essential oils, shop here or email me for a free 1:1 consultation.
“The meaning of life is to find your gift. The purpose of life is to give it away.” — Pablo Picasso
The Healing Power of Giving: How Baking Bread Connects Me to Kindness
Pain has a way of making our world feel small. When we’re struggling—physically, emotionally, or spiritually—it’s easy to become consumed by what we’ve lost or what feels out of reach. For me, my journey with chronic pain and the inability to work in assisted living has been a deeply challenging transition. But I’ve found that one of the most powerful ways to shift my focus away from what I can’t do is to pour my energy into something kind, something bigger than myself. For me, that something is baking bread.
Every week, I bake fresh sourdough loaves for a church that feeds the homeless. There is something profoundly healing about mixing just three simple ingredients—flour, water, and salt—into a wholesome, nourishing loaf. But the true magic lies in the love and intention that go into each batch. With every stretch and fold of the dough, I pour in my care. As the bread rises, so does my heart. And when I place those warm loaves into the hands of someone in need, I feel a connection that transcends my own struggles.
Science supports this too.
Acts of kindness release endorphins, reduce stress, and even lower levels of pain. When we give from the heart, we create meaning in the midst of our own suffering. Baking bread has become more than just an act of service; it’s a form of therapy, a way to stay connected to purpose when my body limits me in other ways. It reminds me that even when I can’t show up in assisted living facilities like I once did, I can still contribute in a meaningful way.
I talk more about this on my podcast, where I share how acts of kindness can be a profound part of our own healing. If you’ve ever felt stuck in your own pain, I invite you to listen and explore ways to shift your focus outward. Maybe for you, it’s writing letters, making meals, or simply offering a kind word to someone in need. Whatever it is, I promise—it will not only lift others but will also lift you.
So, the next time you’re feeling lost in your own pain, ask yourself:
What can I do for someone else today? The answer might just bring a little healing to your own heart.
If you love my content and want more tools for mindfulness & movement, check out my digital products on Buy Me a Coffee! Your support helps me continue creating.
Springtime Strawberry Scones: A Fresh & Fluffy Delight
As the days grow warmer and the first signs of spring emerge, it’s the perfect time to bring fresh, seasonal flavors into the kitchen. These Strawberry Scones are light, buttery, and bursting with the sweet-tart flavor of juicy strawberries. Whether enjoyed with a cup of tea on a sunny morning or as a delightful afternoon treat, these scones embody the essence of spring.
What makes these scones so special? They are made with frozen strawberries, a touch of lemon zest for brightness, and just the right amount of sweetness. The secret to achieving the perfect texture—flaky on the outside, tender on the inside—is using cold butter and a gentle touch when mixing the dough. Using frozen strawberries keeps the dough cold which is key for scone making and you can stock up when they are on sale.
Why You’ll Love These Scones: Seasonal Goodness – Strawberries add natural sweetness and a pop of color and feel like spring! A Hint of Citrus – Lemon zest enhances the fruity flavors and adds a refreshing zing. Buttery Perfection – Cold butter creates a flaky, melt-in-your-mouth texture. Perfect for Any Occasion – Enjoy them at brunch, as a snack, or with your favorite tea.
For an extra indulgence, drizzle them with a simple glaze or serve with clotted cream and jam. I love a tiny bit of lemon in my glaze. These homemade scones are a celebration of spring, bringing a little sunshine to your table with every bite.
Here’s a delicious Frozen Strawberry Scone recipe! .
Strawberry Scones Recipe
Ingredients:
2 cups (250g) all-purpose flour
1/4 cup (50g) granulated sugar
1 tbsp baking powder
1/2 tsp salt
1/4 cup (113g) unsalted butter, very cold and shredded
1/2+ cup frozen strawberries, chopped
1/2 cup heavy cream or half and half
1 large egg
1 tsp vanilla extract
Optional Glaze:
• 1/2 cup powdered sugar
• 1 tbsp milk or lemon juice
Directions:
Combine the dry ingredients in a medium size bowl. Grate your frozen butter directly into the dry mixture. Using your clean hands or a pastry cutter to create pea size crumbles of butter in the dry mixture. In a small bowl combine the wet ingredients. Make a well in the middle of the dry mixture and pour the wet ingredients into it. Using a spatula gentle stir without overtaxing.
The mixture will be somewhat dry and crumbly, don’t add more liquid. Turn onto a slightly floured surface and knead gentle to form a ball. Press into a disk shape and using either a bench scraper to cut wedges, or use a small round cutter for a round shape. If using this option, press the extra dough into a a disk again to keep using the round cutter.
Place wedges or rounds onto a parchment lined baking sheet. Preheat the oven to 400 degrees. While the oven is heating, place the baking sheet with scones into your freezer to keep cold. Once the oven is hot, bake for 20-22 minutes, or until the edges are slightly browned. Allow to cool and when cool, drizzle glaze onto scones.
Enjoy!
If you love my content and want more tools for mindfulness & movement, check out my digital products on Buy Me a Coffee! Your support helps me continue creating.
Coconut lemon scones are a delightful baked treat that combines tropical coconut flavors with the bright, tangy zest of lemon. They are tender and slightly crumbly, with a rich yet refreshing flavor profile.
Ingredients:
Scones
2 cups all-purpose flour
2 teaspoons baking powder
¼ cup granulated sugar
1 teaspoon kosher salt
4 tablespoons (1/2 stick) cold salted butter, cubed or grated
Preheat oven to 400°F. Line baking sheet with parchment paper.
In a large glass bowl, whisk together flour, baking powder, granulated sugar, and salt. Cut the butter into the mixture using a pastry cutter or fingers until the mixture resembles coarse sand. Add the coconut.
Make a well in the center of the dry mixture and add ¾ cup of the heavy cream, beaten egg, and lemon juice. Mix the dough together. It should have a slightly dry texture, but not crumbly. Add an additional 1-2 tablespoons of heavy cream if the dough seems too dry.
Transfer the dough to a lightly floured surface and knead it for 1 minute. Form the dough into a round 1-inch thick, and use a knife or a pizza 4. cutter to cut the round into 8 equal wedges. I also cut them one more time to make mini scones. Arrange the wedges in a round, but about 1 inch apart, on the baking sheet. Brush the wedges with 4 tablespoons heavy cream and bake for 15 to 20 minutes, until the scones are golden and the edges are lightly toasted.
For the glaze:
In a glass bowl, whisk together the powdered sugar, heavy cream, lemon juice, and lemon essential oil. Drizzle the glaze on top of the warm scones.
Serve the scones warm or cold. Either way they will be delicious!
*Note: It is important to be sure you are using an essential oil that is safe for consumption. Many so called ‘essential oils’ from drugstores and grocery stores are quite toxic if taken internally. I choose to use only Certified Pure Therapuetic Grade doTERRA Essential oils. I recommended working closely with someone who can mentor you on the use of essential oils. You can also downloaded this free ebook that is a perfect guide for using essential oils.
I would love to hear what you think! Comment below and let me know if you loved these!
If you love my content and want more tools for mindfulness & movement, check out my digital products on Buy Me a Coffee! Your support helps me continue creating.
These sourdough discard chocolate chip cookies are so good! The sourdough gives them moisture and a bit of tangy goodness.
I’ve been making sourdough bread for about six months and have mastered a few of the discard recipes like banana muffins, waffles, English muffins and crackers. If you aren’t sure what I am talking about the “discard” is the stuff you would throw away when feeding your starter—I keep mine in a jar in the fridge so when I get the push to bake something, I have extra for some fun recipes.
I am a huge fan of cookies but rarely make them because I have zero self control when it comes to cookies. Thankfully I have a house full of people coming this weekend who will gobble these up in no time.
Sourdough Discard Chocolate Chip Cookies Recipe
*This recipe requires you to chill the cookie dough for at least 2 hours FYI! Don’t skip this step because it will help your cookies bake up the best!
Ingredients:
• 1 3/4 + 1 Tablespoon all-purpose flour
• 1 tsp. salt
• 1/4 tsp. baking soda
• 1/2 tsp. baking powder
• 1 large egg
• 1/2 cup sourdough discard
• 1 tsp. vanilla extract
• 1 stick of butter
• 1/2 cup light brown sugar
• 1/2 cup white sugar
• 1 1/2 cups of semi-sweet chocolate chips (butterscotch chips are great, too!)
How to Make Sourdough Discard Chocolate Chip Cookies
1. In a large bowl mix all your dry ingredients. Use a fork to whisk together the flour, baking soda, baking powder and salt and then set aside.
2. In a separate smaller bowl, mix together the egg, sourdough discard and vanilla. Set aside.
3. In a mixer add your cold, cubed butter and both the brown and white sugar. Beat on low-speed until the mixture forms small crumbles. This shouldn’t take more than 1 minute. Add the chocolate chips and mix for another 30 seconds. You can also hand mix just make sure everything gets incorporated well.
4. Add all your dry ingredients and mix on low-speed for about 30 seconds or a few minutes by hand. Once the dough begins to pull away from the bowl, you’re good! Don’t over mix.
5. Make small balls of dough either with a cookie scoop or a large spoon. Place on a parchment paper lined cookie sheet. Put cookie sheet in the refrigerator for at least 2 hours. I have also used a mini muffin pan like this, or in a pinch for time made cookie bars using a baking pan like this.
6. Bake for 15 minutes at 375 degrees or until golden brown.
If you happen to have any left, you can store in an air tight container and these also freeze really well. I also love to give a little gift to others using this cute boxes you can write a special message on.
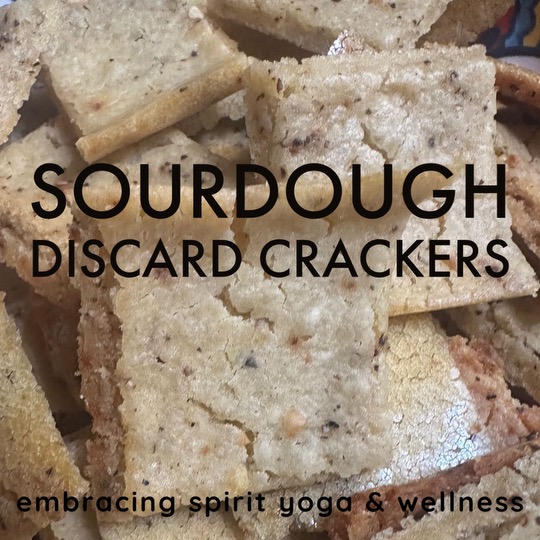
Ever since I shared some sourdough discard crackers over on my instagram I have had a zillion questions about them. If you haven’t jumped into the sourdough craze you are definitely missing out. I will admit that at first it seemed like a LOT of work and time, but it really isn’t. I mean how much time do we spend mindlessly scrolling when we could spend a tiny bit of time eliminating garbage from our diet and making something soulful and delicious?
Before I share the super simple cracker process, let’s chat about sourdough.
What is sourdough?
Sourdough relies on a mix of wild yeast and lactic acid bacteria, rather than baker’s yeast, to leaven the dough. It’s richer in nutrients, less likely to spike your blood sugar, contains lower amounts of gluten, and is generally easier to digest than bread made with baker’s yeast.
Store bought bread has so many ingredients in it and most of them are useless ingredients that just add junk to our food. Homemade sourdough is flour, water, salt. Three ingredients compared to over twenty in a store bought version. Hmmm.
By using a special starter of wild yeast and bacteria, the positives of consuming sourdough far outweigh the negative ideas that we should be avoiding bread. Sourdough bread is a baking art form that is, by its very nature, a healthier choice – according to A Bread Affair in Vancouver here are the reasons why…and have to agree 100%.
The Benefits of Sourdough:
1. It is easy to digest.
The bacteria-yeast composition will start to breakdown the starches found in the grains before it even reaches your stomach. That means there is way less work to be done, making it much easier on your gut.
2. It has a lower glycemic index.
Compared to many other types of bread, sourdough is fermented in a way that depletes bad starches within it. This means that it won’t cause your blood sugar to rise so drastically upon eating it.
3. Better for gluten-sensitivity.
The longer prep time for sourdough bread means that much of the protein gluten is broken down into amino acids before you consume it. The extensive soaking, rinsing, and other preparation steps means that it is easier to eat and digest, especially if you have mild sensitivities to gluten.
4. More “good acid”.
Lactobacillus a kind of bacteria found in sourdough bread more so than other types of bread and it results in higher levels of lactic acid. This is important because it means there is less room for phytic acid, which can be potentially dangerous. Larger quantities of lactic acid also result in easier digestion and accessibility to more minerals.
5. Provides healthy bacteria.
Sourdough bread is fermented in a way that fosters more beneficial bacteria in the bread and in your body when you eat it.
6. Less yeast.
Healthy bacteria in sourdough bread works to reduce yeast populations, so the likelihood of infection and/or overgrowth is substantially lower.
7. Natural origins.
Sourdough bread made with whole flour, wild yeast and bacteria comes from a very “natural” origin. It is the oldest form of leavened bread; we have been eating it as part of a natural diet for a long, long time.
8. Fewer preservatives.
Sourdough bread contains acetic acid, which naturally prevent the growth of mold. It naturally preserves itself, meaning that toxic preservatives are not required to make it last. So it won’t go bad – and you can opt out of the hazardous build-up of preservatives in the food supply chain.
9. Good fuel.
Made from wheat, sourdough bread fuels the production of good bacteria in your gut – much like the inulin and oligosaccharides found in onions, leeks, bananas, garlic, asparagus, and so on.
10. It’s nutritious.
Sourdough contains a variety of vitamins and nutrients, making it super beneficial to your day-to-day health. Sourdough bread has small to moderate amounts of: iron, manganese, calcium, B1-B6, B12, folate, zinc, potassium, thiamin, niacin, riboflavin, selenium, iron, manganese, magnesium, phosphorus, and vitamin E. What a great selection! Compared to other breads, sourdough maintains many of the original nutrients that are processed out of other kinds of bread.
11. The taste!
Sourdough bread tastes great on top of being a healthier alternative. What more could you want?
Crackers?? You got it! I also use sourdough to make all kinds of fun things like pizza dough, pancakes, cookies and this weekend I am making English muffins!
First, you’ll need some sourdough “starter”. This consists of flour and water that becomes the base for your bread and other baked goods.
Simply put: a sourdough starter is a live fermented culture of fresh flour and water. Once combined, the culture will begin to ferment and cultivate the natural yeasts found in our environment. A small portion is added to your bread dough to make it rise. Commercial yeast IS NOT required.
The Process of Sourdough:
At first I felt overwhelmed with having to “feed” something and initially wondered if I had a new child to worry about but realized I was way over thinking it.There are some sourdough people out there that measure everything to to the gram and while that does produce a perfect loaf, after awhile you do learn to eyeball things, especially feeding the starter. I usually just pour some out into my discard jar and add 1/2 cup flour and 1/4 cup water and call it good for the week. The day before I bake bread I do feed her a twice so she is extra happy.
For crackers, cookies, muffins, pizza dough and so much more you’ll need some of the “discard”.
Sourdough discard is the unfed portion of your sourdough starter that you remove before you add fresh flour and water. Because of its unfed state, it’s not used to bake the delicious bread you know as sourdough, but more often than not, used in sourdough discard recipes like crackers!
There are a zillion recipes out there but after a few times following one you might learn to wing it like me.
Sourdough Discard Crackers
Preheat the oven to 325 degrees.
In a small mixing bowl add 2-3 tablespoons of olive oil or melted butter. To this add seasonings you love. I have been adding Trader Joe’s 21 Seasoning Salutewhich is a smooth blend of onion, black pepper, celery seed, cayenne pepper, parsley, basil, marjoram, bay leaf, oregano, thyme, savory, rosemary, cumin, mustard, coriander, garlic, carrot, orange peel, tomato, lemon juice and lemon oil. The perfect savory flavor!
After combing the seasonings and oil, add 2 cups of sourdough discard and mix well.
Sprinkle Himalayan Pink Salt on top
Pour mixture onto a baking sheet lined with parchment paper
Bake for 10 minutes and then score into bite size squares with a pizza wheel
Bake an additional 20-30 minutes or until crispy and golden brown
I store these once cooled in a sealed container or jar (if they last that long)
Other combinations include parmesan cheese and rosemary or making an Italian herb blend flavor. Some people love the everything bagel flavor but I find smelling like garlic for days to be a slight downside. I saw someone also make cinnamon sugar crackers that were cut slightly smaller for a cereal type snack!
You might be able to see how this can easily become a part time obsession and finding new ways to use the discard is constantly fun.
Stacie believes that it is her life purpose to share the gift of Yoga with anyone who is willing to say yes. In addition to raising a family and being an advocate for those with disabilities, Stacie is founder of Embracing Spirit Yoga which specializes in bringing adaptive Yoga into community centers and rehabilitation clinics. Bringing her depth of compassion to the mat–or the chair–she offers students the opportunity to grow as an individual in all aspects of their life.
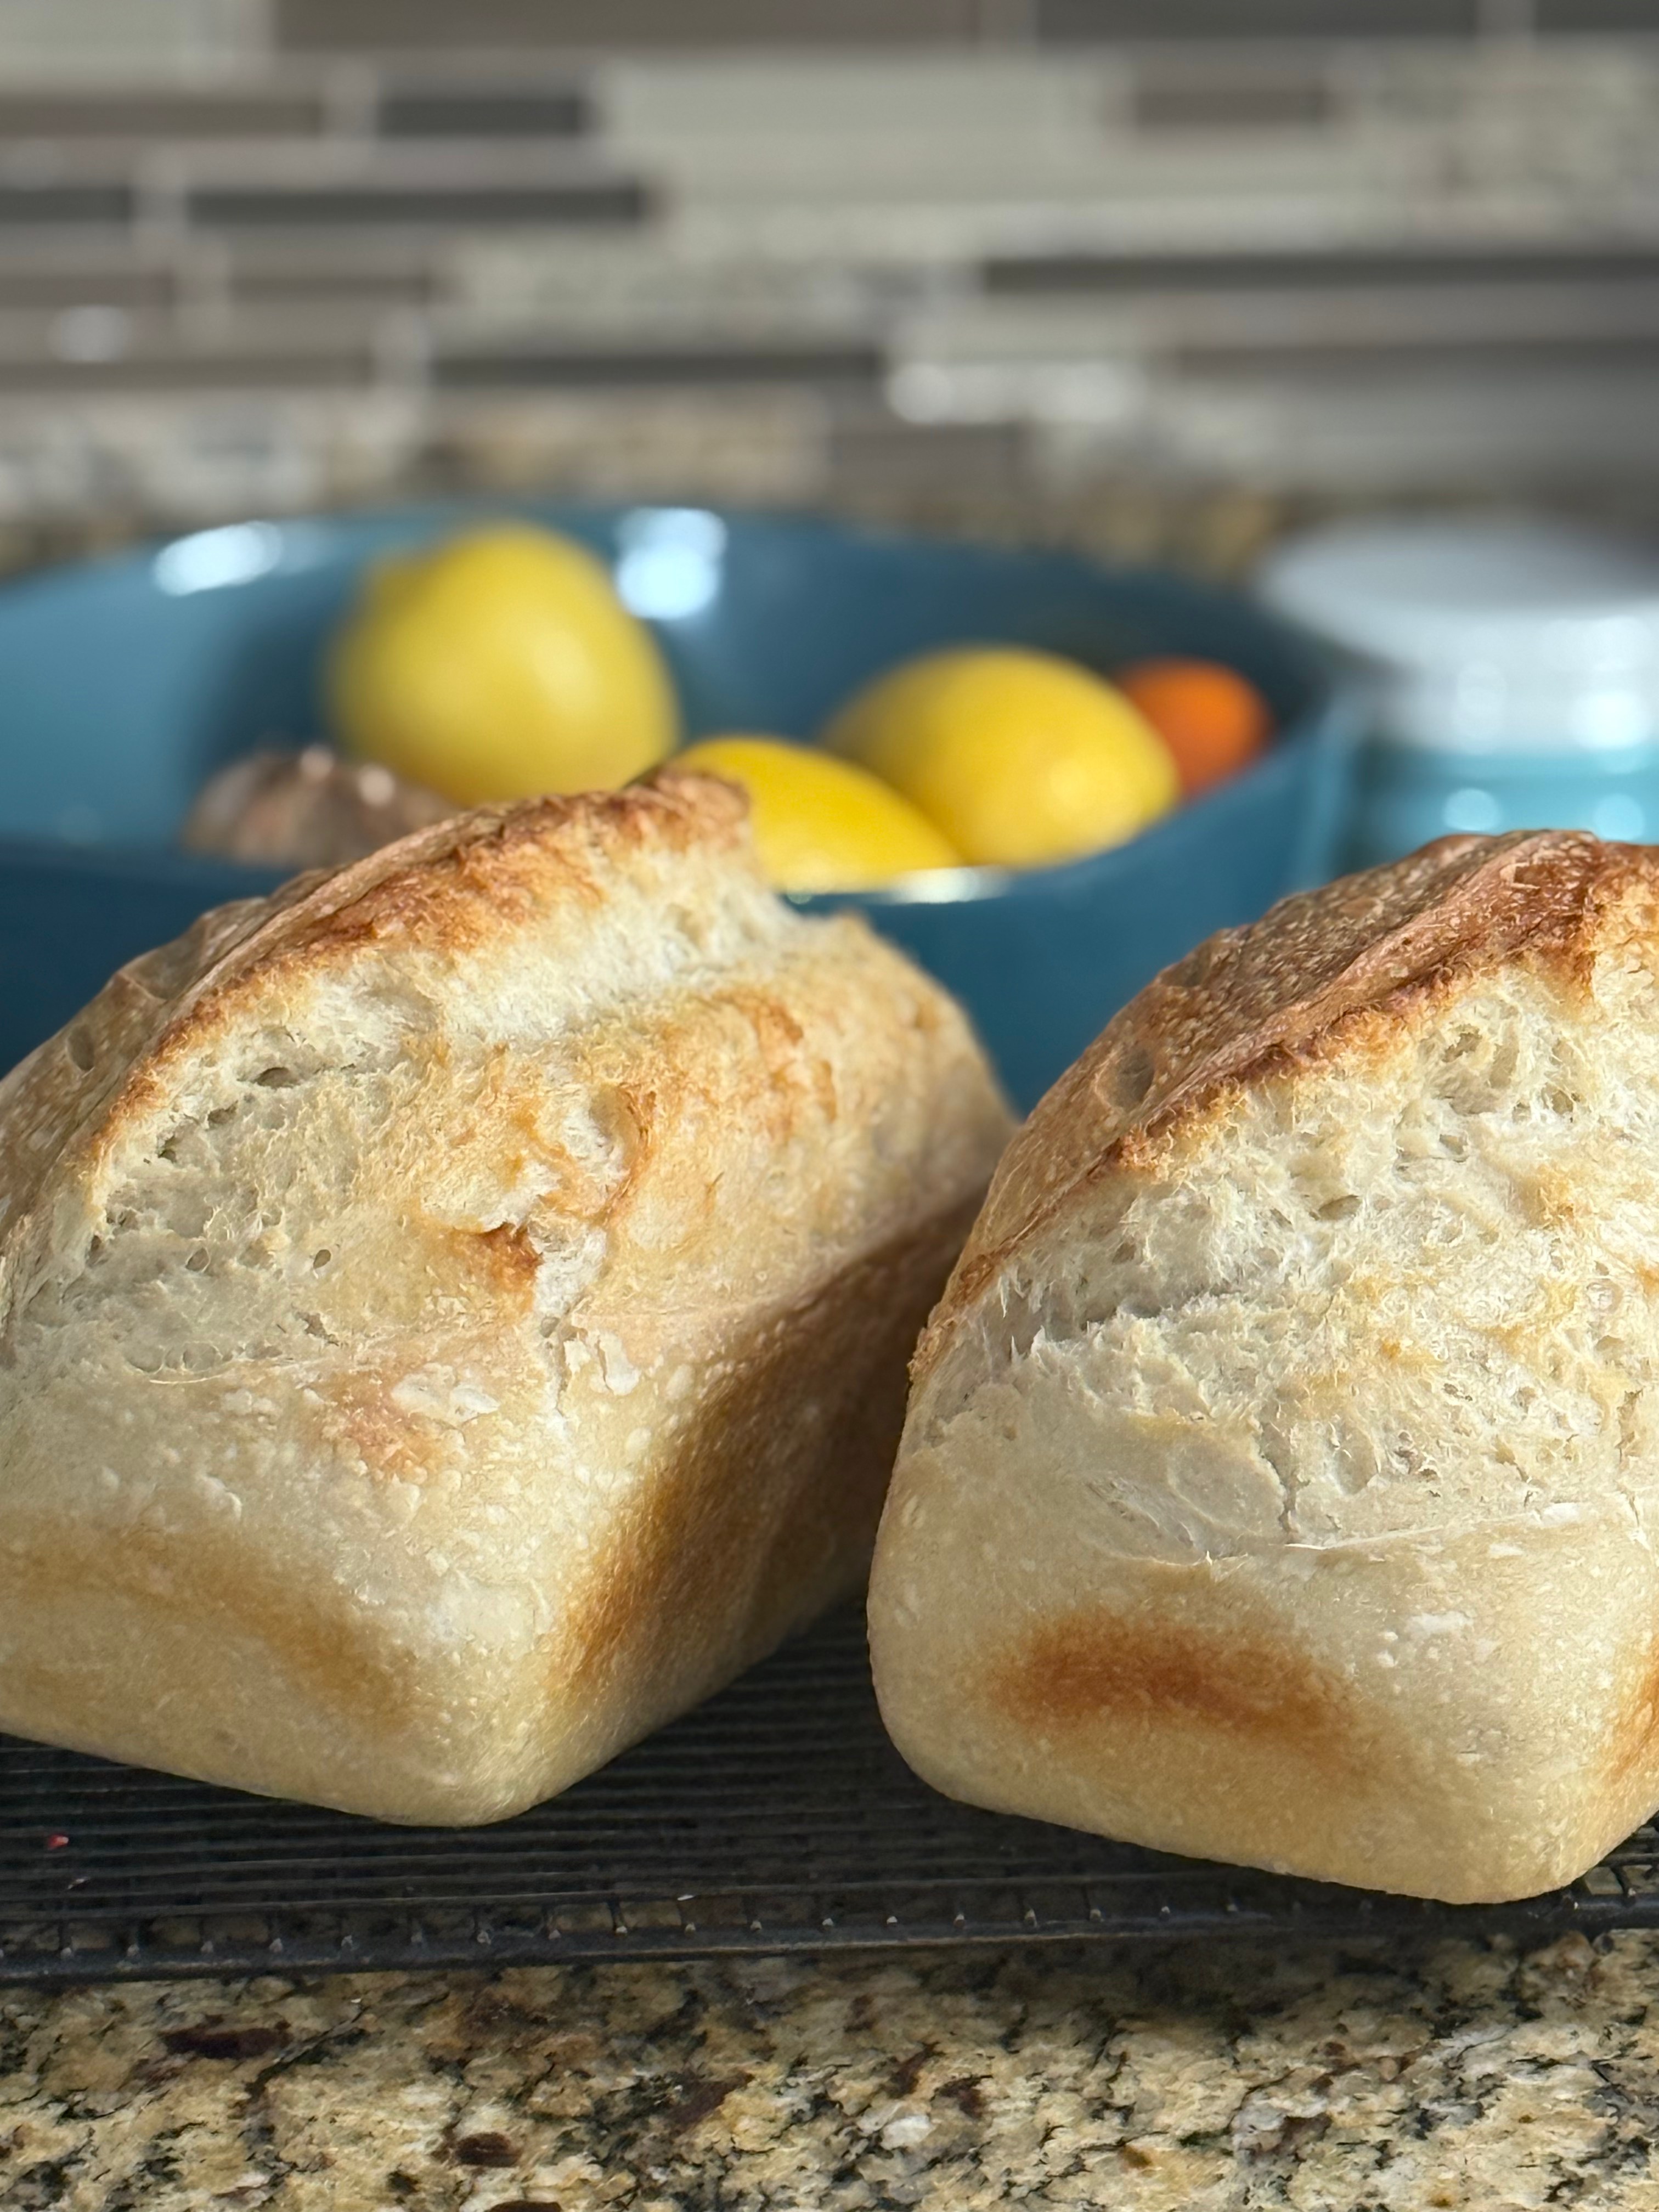
I am a tad late to the sourdough bread frenzy but now that I am all in, it’s been so fun. I have seen so many people explain why to eat sourdough bread and I just didn’t get it. Until I did.
I have never been a big sandwich or bread eater so it’s more of a hobby than a homestead mission. My loaves may not be the perfection instagram worthy photo yet, but they taste delicious and work for my family.
Why bake/eat sourdough bread?
There are so many benefits to sourdough. Plus, it is so fun to make and the extra goodies that you can bake make it so versatile.
Here are my top 20 reasons:
Prebiotics: Sourdough fermentation increases the availability of prebiotic fibers, which promote healthy gut bacteria and aid digestion.
Reduced Gluten Content: Fermentation breaks down some gluten proteins, making them easier to digest for individuals with mild gluten sensitivities.
Enzyme Activity: The fermentation process activates enzymes in the sourdough, which help break down complex carbohydrates and proteins, aiding digestion.
Phytic Acid Reduction: Sourdough fermentation reduces phytic acid, a compound that can impair mineral absorption and cause digestive discomfort.
Improved Nutrient Absorption: Sourdough fermentation enhances the body’s ability to absorb important nutrients like iron, zinc, and magnesium.
Lower Glycemic Index: Sourdough bread has a lower glycemic index than regular bread, resulting in more stable blood sugar levels and sustained energy.
Acetic Acid: The acetic acid produced during sourdough fermentation can improve digestion by supporting the production of digestive enzymes.
Lactic Acid Production: Lactic acid produced in sourdough fermentation supports healthy gut bacteria and aids digestion.
Alleviation of Digestive Disorders: Some individuals with digestive disorders, such as irritable bowel syndrome (IBS), report improved symptoms when consuming sourdough bread.
Increased Mineral Bioavailability: Sourdough fermentation increases the bioavailability of minerals present in the bread, making them easier for the body to absorb and utilize.
Reduced FODMAPs: The fermentation process of sourdough helps break down fermentable carbohydrates, reducing their presence in the final bread product and making it more tolerable for individuals with FODMAP sensitivities.
Reduced Antinutrients: Sourdough fermentation reduces antinutrients like phytates and lectins, which can interfere with digestion and nutrient absorption.
Balanced Acid-Base Ratio: Sourdough bread has a more balanced acid-base ratio, reducing the risk of acid reflux and indigestion.
Improved B-vitamin Production: Sourdough fermentation increases the production of B-vitamins, which play a crucial role in digestion and overall health.
Enhanced Flavor: The complex flavors developed during sourdough fermentation can stimulate the production of saliva and digestive enzymes, aiding digestion.
Extended Fermentation: Longer fermentation times commonly used in sourdough baking allow more thorough breakdown of proteins and starches, making the bread easier to digest. 48 hours is optimal for cold retarding in the fridge.
Natural Preservatives: Sourdough contains naturally occurring preservatives like acetic and lactic acids, which help prevent spoilage and promote digestive stability.
Reduced Additives: Sourdough bread often uses fewer additives and preservatives compared to commercially produced bread, making it easier on the digestive system.
Milder Wheat Allergy Symptoms: Some individuals with wheat allergies report milder symptoms when consuming sourdough bread due to the fermentation process altering the proteins.
Personal Digestive Tolerance: While these reasons generally suggest that sourdough bread is easier to digest, individual tolerance can still vary based on specific digestive issues and personal sensitivity
Credit to Dr Dawn M. O’Brien Taylor
I have tried many sourdough recipes but have found this simple one to be my fave:
100g of “starter” *tons of how to make out there. It takes patience or a friend who has a healthy starter.
300g of all purpose flour
500g water
10g salt
I feed my little starter and wait for it to double (usually 3-4 hours). When it has I add it to the mixing bowl, add the water flour and salt, and mix with a danish wisk until shaggy or 30 minutes. Then every 30 minutes I stretch and fold the dough (this is where the magic happens). I do four sets of folds. Then I plop it back into the oven on the proofing setting for about 2-3 hours. If your oven doesn’t have that setting, place bowl on the counter covered up and it will take more like 5-6 hours of bulk proofing.
Once it is doubled in size, then remove it from the bowl to a floured surface. Fold the dough like an envelope and then roll the entire envelope into a log shape, then to make it a circle begin dragging it along counter to seal the seams and create a perfect round. Toss into a banneton basket and close seam by pinching. Place into your refrigerator covered for up to 3 days! This method I have found in my busy life works the best because I can let it cold ferment in fridge until I am ready then bake. I usually mix on Friday and bake on Sunday.
Since I am a newer sourdough fanatic I have quite a bit of extra sourdough. Honestly, I try not to eat the whole loaf in a couple days so I usually have a quarter of loaf hanging around and found the perfect use of stale sourdough.. Sourdough CROUTONS!
Sourdough croutons provide the perfect crunch to a fresh salad. This homemade version of sourdough croutons does not contain any extra ingredients.
INGREDIENTS
6-8 cups cubed sourdough bread (at least one day old, or sliced and dried; ¾-1 inch cubes)
4 tablespoons olive oil
3 garlic cloves, minced
½ – 1 teaspoon kosher salt
1 teaspoon dried parsley flakes
¼ teaspoon black pepper
INSTRUCTIONS
How to Make Sourdough Croutons:
Preheat your oven to 400ºF and line a baking sheet with parchment paper. Set aside.
If you haven’t already, cut your sourdough bread into ½-1″ cubes.
Add the olive oil, garlic, salt, dried parsley, and black pepper to a very large bowl. Whisk to combine.
Add the cubed dried bread cubes and toss them until they are lightly coated with oil.
Spread the sourdough bread cubes out onto the prepared baking sheet in a single layer.
Bake until browned, 12-18 minutes (mine were done at 15), tossing halfway through baking to ensure even browning.
Allow your sourdough croutons to cool completely before transferring to an airtight storage container or ziploc bag.
I am a sucker for a good scone. One of my favorite afternoon treats is a delicious coffee and a scone. I like to make these into small size scones so I don’t ruin my appetite or my exercise efforts. The little treat is so worth it, though.
These tangerine cranberry scones are super delicious pretty much any time of day. Not just for afternoon coffee time. You could have them for breakfast, brunch or dessert.
Health Benefits of Cranberries:
As far as healthy foods go, cranberries are at the top of the list due to their high nutrient and antioxidant content and are often referred to as a “super food.” Not to mention, half a cup of cranberries contains only 25 calories! The possible health benefits of consuming cranberries include lowered risk of urinary tract infections, prevention of certain types of cancer, improved immune function, decreased blood pressure and more.
Preheat oven to 425°F. Line baking sheet with parchment paper.
In a large glass bowl, whisk together flour, baking powder, granulated sugar, and salt. Cut the butter into the mixture using a pastry cutter or fingers until the mixture resembles coarse sand. Add the tangerine zest and dried cranberries.
Make a well in the center of the dry mixture and add ¾ cup of the heavy cream. Mix the dough together. It should have a slightly dry texture, but not crumbly. Add an additional 1-2 tablespoons of heavy cream if the dough seems too dry.
Transfer the dough to a lightly floured surface and knead it for 1 minute. Form the dough into a round 1-inch thick, and use a knife or a pizza 4. cutter to cut the round into 8 equal wedges. Arrange the wedges in a round, but about 1 inch apart, on the baking sheet. Brush the wedges with 4 tablespoons heavy cream and bake for 15 to 20 minutes, until the scones are golden and the edges are lightly toasted.
For the glaze:
In a glass bowl, whisk together the powdered sugar, tangerine zest, orange juice, and tangerine essential oil. Drizzle the glaze on top of the warm scones.
Serve the scones warm or cold. Either way they will be delicious!
*Note: It is important to be sure you are using an essential oil that is safe for consumption. Many so called ‘essential oils’ from drugstores and grocery stores are quite toxic if taken internally. I choose to use only Certified Pure Therapuetic Grade doTERRA Essential oils. I recommended working closely with someone who can mentor you on the use of essential oils. You can also downloaded this free ebook that is a perfect guide for using essential oils.
I would love to hear what you think! Comment below and let me know if you loved these!
A cold and blustery morning is perfect for baked oatmeal. Snow is swirling all around this Sunday morning like I am inside a snow globe. It is so pretty and it makes me want to bake something. I am not a huge breakfast girl but the idea of something warm and cinnamony sounded so good. An added bonus– this has no flour, no eggs and is simple to put together.
This is SO easy and so delicious.
Ingredients:
2 ripe bananas
2 cups rolled oats
1 scoop vital proteins collagen (optional)
2 tablespoons chia seeds
1 1/2 cups oat milk (or whatever milk you like)
dash of cinnamon
handful of blueberries
Instructions:
In a shallow baking dish (I used 8 x 11), mash the bananas. Add the oats, collagen and chia seeds. Pour the milk over. Add the cinnamon and blueberries. Bake in a 350 degree over for 30 minutes. Drizzle with honey if desired!
For an easy afternoon treat or dessert you could easily swap out blueberries for chocolate chips!