Soft sandwich sourdough bread is a delightfully tender and versatile loaf. It has a subtle tang from the sourdough starter, a soft crumb that slices easily, and a light, golden crust. This bread is enriched with ingredients like honey and avocado oil which make it softer and less chewy than traditional artisan sourdough. It’s perfect for sandwiches, toast, or even French toast, offering a balance of flavor and texture. You get the tang of sourdough with the softness of traditional bread.
For the best soft sourdough sandwich bread, a kitchen scale ensures your dough has the perfect hydration and ingredient balance, leading to predictable results and a superior loaf! This scale is perfect and affordable! I resisted the scale for a long time but now I see it makes it so much easier!
Why Weighing Ingredients is Better Than Using Cups
Precision:
Weight measurements are exact, eliminating variability caused by how ingredients are scooped or packed into a measuring cup. For example, flour can compress or aerate, leading to significant weight differences in a “cup.”
Consistency:
Baking is a science, and even small deviations in ingredient ratios can affect the outcome. Weighing ensures consistency every time you bake.
Efficiency:
Weighing is quicker and reduces the number of tools used. You can measure directly into your bowl, avoiding multiple cups and spoons.
Universal Accuracy:
Recipes using weight measurements are consistent globally, regardless of regional cup sizes (which can vary slightly between countries).
Liquid and Solid Measurements:
Weighing works equally well for liquids and solids, removing confusion about measuring sticky or dense ingredients like honey or sourdough starter.
Ingredients:
Active sourdough starter: 1/2 cup (100g)
Warm water: 1 cup (200g)
Avocado or Olive Oil: 1 1/4 tbsp (20 g)
Honey: 1 tbsp (20 g)
Bread flour: 3 1/2 cups (400 g)
Salt: 1 1/2 tsp (8g)
Instructions:
Mix the Dough:
Using a stand mixer, combine the sourdough starter, warm water, milk, melted butter, and honey. Stir well to dissolve.
Add the bread flour and salt. Mix until the dough comes together into a shaggy ball.
Knead the Dough:
Use a stand mixer with a dough hook for about 6-8 minutes.
If you don’t have a mixer, mix by hand kneading on counter for 7-8 minutes until smooth.
Let the dough sit for one hour covered.
Stretch and Fold:
After one hour stretch the dough, turn bowl 1/4 and repeat 3 times.
Rest another hour and repeat stretch and fold process.
Bulk Fermentation & Shape the Loaf::
Lightly grease a 9×5-inch loaf pan.
Place the dough in prepared pan and cover it with a damp towel or plastic wrap.
Let it rise at room temperature until it doubles in size, about 8-10 hours (depending on the temperature and the activity of your starter).
Bake the Bread:
Preheat your oven to 375°F (190°C).
Bake the bread for 35-40 minutes, or until golden brown and it sounds hollow when tapped.
Optional: Brush the top with melted butter immediately after baking for a softer crust.
Cool and Slice:
Remove the bread from the pan and let it cool completely on a wire rack before slicing.
This bread is soft, slightly tangy, and perfect for sandwiches. Enjoy!
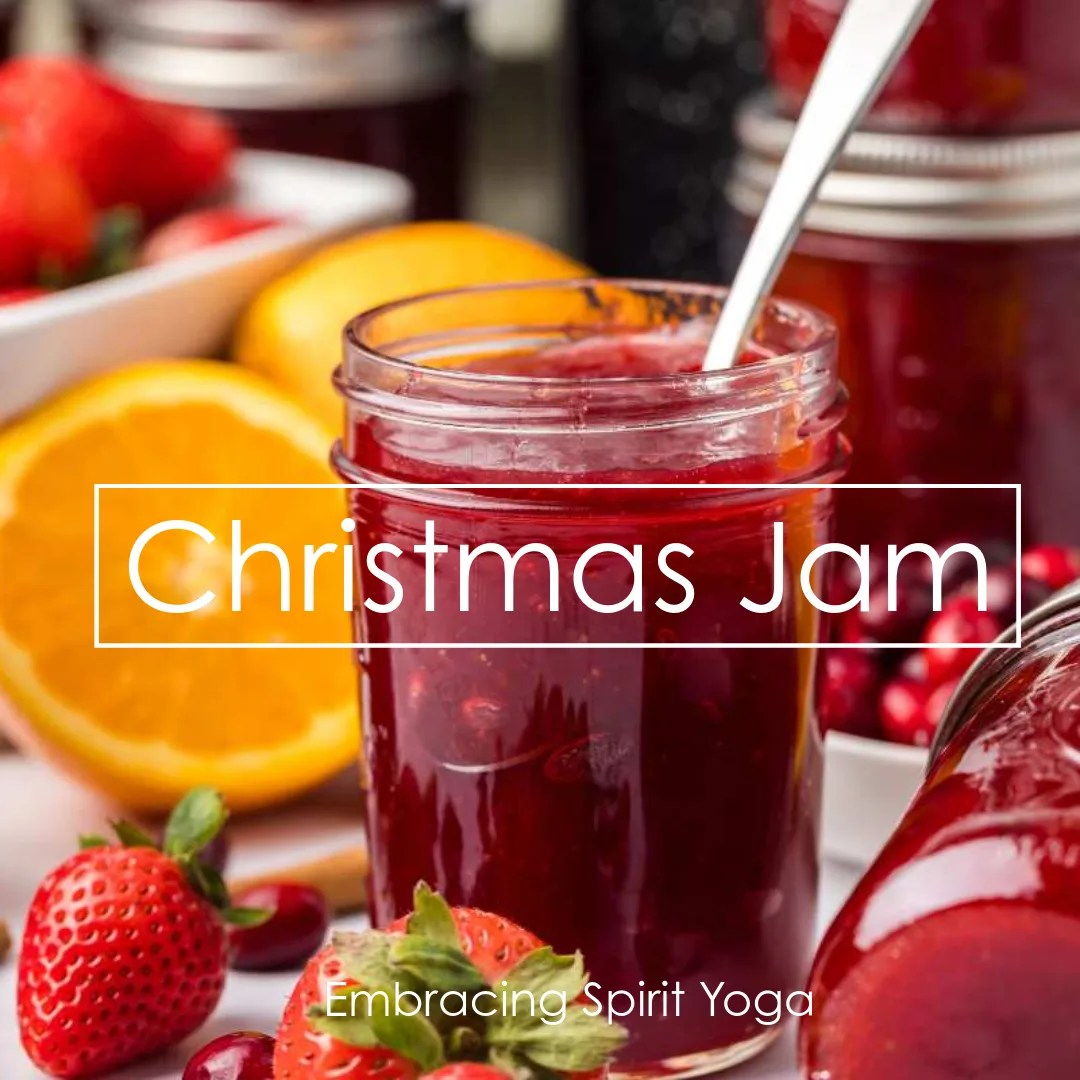
Strawberry and Cranberry Christmas Jam combines the sweetness of strawberries with the tartness of cranberries, creating a bright and flavorful preserve with a perfect balance of sweet and tangy notes. This jam is enhanced with warming spices, making it an ideal spread for the holiday season.
The jam can be spread on toast, served with cheeses, or used as a topping for desserts like cakes and ice cream. It’s often packaged as a thoughtful gift during the holiday season, making it a popular homemade treat for Christmas celebrations.
Strawberry and Cranberry Christmas Jam Recipe
Ingredients:
6 cups fresh or frozen strawberries
2 cups fresh or frozen cranberries
5 cups granulated sugar (adjust based on your sweetness preference)
1 tablespoon fresh lemon juice (helps balance the tartness)
1 teaspoon ground cinnamon
½ teaspoon ground ginger
¼ teaspoon ground cloves
¼ teaspoon ground nutmeg
1 tablespoon orange zest (optional, for extra citrusy depth)
1 teaspoon vanilla extract (optional, for added warmth)
Instructions:
Prepare the fruit:
Thaw the frozen strawberries.
Rinse the cranberries
Puree the strawberries with the cranberries using a food processor. I found added both fruit helped the cranberries puree a little easier.
Cook the fruit:
In a large saucepan, combine the strawberries and cranberries. Add the sugar. Cook over medium heat and bring to a boil.
Once the mixture starts to simmer, add the spices.
Add the sugar and spices:
Stir in the , cinnamon, ginger, cloves, nutmeg, and orange zest (if using). Continue cooking over medium heat, stirring constantly to prevent burning. The mixture will start to thicken as it cooks down.
Remove from the heat and add the fruit pectin.
Cook the jam:
Let the jam return to a boil for another minute, stirring constantly. .
Add vanilla extract (optional):
Once the jam has boiled, stir in the vanilla extract for a warm, aromatic flavor boost.
Jar the jam:
Sterilize your jars by boiling them in water for 10 minutes, or by running them through a dishwasher cycle.
Carefully spoon the hot jam into the sterilized jars, leaving about ¼ inch of space at the top. Wipe the rims clean with a damp cloth before sealing the jars with lids.
Seal and cool:
If you want to preserve the jam long-term, you can process the jars in a water bath canner for 10 minutes to ensure they seal properly. Alternatively, you can store the jam in the fridge for up to 3-4 weeks or freeze it for longer storage.
Serving Suggestions:
Spread on toast or scones for a festive breakfast or brunch.
Use as a topping for cream cheese or goat cheese on crackers for a holiday appetizer.
Spoon over vanilla ice cream or cheesecake for a delicious dessert.
This Strawberry and Cranberry Christmas Jam is a perfect homemade gift, too. It captures the flavors of the season and adds a personal, heartfelt touch to your holiday celebrations. Enjoy!
Sourdough Discard Chicken and Dumplings is the perfect comfort food, blending the rich warmth of homemade chicken soup with pillowy, tangy dumplings. Let’s face it comfort food is where it’s at.
Comfort food is like edible nostalgia—a warm, familiar hug on a plate. It’s the type of food that feels nourishing and soul-satisfying, often tied to memories of home, family, or simpler times. Comfort food dishes are usually rich in flavor, hearty, and filling, and they evoke a sense of coziness, safety, and calm.
Here’s my favorite recipe for Sourdough Discard Chicken and Dumplings that’s comforting, hearty, and a great way to use sourdough discard!
Ingredients
For the Soup:
1 whole chicken (about 4-5 pounds) or 1 pound of boneless chicken thighs/breasts
8 cups chicken broth
2 large carrots, diced
2 celery stalks, diced
1 large onion, diced
3 garlic cloves, minced
1 bay leaf
1 tsp dried thyme
Salt and pepper, to taste
2 tbsp olive oil or butter
For the Sourdough Dumplings:
1 cup all-purpose flour
1/2 cup sourdough discard
1/2 cup milk
2 tsp baking powder
1/2 tsp salt
2 tbsp melted butter or olive oil
Fresh herbs like parsley or chives (optional)
Instructions
Step 1: Make the Soup
In a large pot or Dutch oven, heat olive oil or butter over medium heat. Add diced onion, carrots, and celery, cooking until softened (about 5-7 minutes).
Add the garlic, cooking for another minute until fragrant.
Pour in the chicken broth, add bay leaf and thyme, and season with salt and pepper.
Place the whole chicken or chicken pieces into the pot and bring to a boil. Lower to a simmer, cover, and cook until the chicken is cooked through (about 20-30 minutes for boneless pieces, 1-1.5 hours for a whole chicken).
Remove the chicken from the pot. Let cool slightly, shred the meat, and discard any bones or skin. Return shredded chicken to the soup.
Step 2: Make the Sourdough Dumplings
In a mixing bowl, combine the flour, baking powder, and salt.
Stir in the sourdough discard, milk, and melted butter until just combined (avoid over-mixing). If desired, add fresh herbs to the batter.
The batter should be thick but spoonable.
Step 3: Cook the Dumplings
Bring the soup to a gentle simmer. Drop spoonfuls of the dumpling batter onto the soup (about 1-2 tbsp per dumpling).
Cover the pot and let the dumplings steam for 10-12 minutes, until they are puffed and cooked through. Avoid lifting the lid during this time.
Step 4: Serve
Remove the bay leaf and adjust the seasoning of the soup as needed.
Ladle soup and dumplings into bowls, garnish with fresh herbs if desired, and serve warm.
This dish is a hug in a bowl! The combination of warm, savory broth, wholesome vegetables, tender chicken, and sourdough dumplings is deliciously filling and satisfying, perfect for cozying up on a chilly day. Enjoy your cozy bowl of Sourdough Discard Chicken and Dumplings!
Here’s a delicious recipe for Sourdough Pumpkin Cookie Bars—perfect for fall and a great way to use sourdough discard!
Ingredients:
Wet Ingredients:
1/2 cup sourdough discard (unfed)
1/2 cup unsalted butter, melted
1 cup pumpkin puree
1 cup brown sugar (packed)
1/4 cup granulated sugar
1 large egg
1 tsp vanilla extract
Dry Ingredients:
2 cups all-purpose flour
1 tsp baking soda
1 tsp baking powder
1 1/2 tsp cinnamon
1/2 tsp nutmeg
1/4 tsp cloves
1/4 tsp salt
Optional Add-ins:
1 cup chocolate chips or white chocolate chips
1/2 cup chopped nuts (e.g., pecans or walnuts)
Instructions:
Preheat the oven to 350°F (175°C) and grease a 9×13-inch baking dish or line it with parchment paper for easy removal.
Mix the wet ingredients: In a large bowl, combine the sourdough discard, melted butter, pumpkin puree, brown sugar, granulated sugar, egg, and vanilla extract. Whisk until smooth and fully incorporated.
Mix the dry ingredients: In a separate bowl, whisk together the flour, baking soda, baking powder, cinnamon, nutmeg, cloves, and salt.
Combine the wet and dry ingredients: Gradually fold the dry ingredients into the wet mixture using a spatula until just combined. Do not overmix.
Add optional ingredients: If using chocolate chips or nuts, gently fold them into the batter.
Bake: Spread the batter evenly into the prepared baking dish. Bake for 25–30 minutes, or until a toothpick inserted into the center comes out clean or with a few moist crumbs.
Cool and slice: Allow the bars to cool completely in the pan before slicing into squares or bars.
Enjoy!
These cookie bars are soft, moist, and packed with warm fall flavors. The sourdough discard adds a subtle tang that pairs beautifully with the pumpkin and spices!
It is pumpkin spice season and I admit that I am here for it. Adding sourdough discard gives it an amazing tang and lots of moisture. This pumpkin spice sourdough discard loaf is truly a fall part in your mouth. I made this loaf last weekend and it was gone quickly!
Here’s a simple Sourdough Discard Pumpkin Bread with Chocolate Chips recipe, perfect for fall:
Ingredients:
1 cup sourdough discard
1 ¾ cups all-purpose flour
1 teaspoon baking soda
½ teaspoon baking powder
1 teaspoon ground cinnamon
½ teaspoon nutmeg
½ teaspoon ground ginger
1 teaspoon pumpkin spice
½ teaspoon salt
1 cup canned pumpkin puree
1 cup sugar (or ½ cup brown sugar + ½ cup white sugar)
2 large eggs
½ cup melted butter
1 teaspoon vanilla extract
1 cup chocolate chips (optional)
Directions:
Preheat the oven to 350°F (175°C) and grease a loaf pan.
Mix dry ingredients: In a bowl, whisk together the flour, baking soda, baking powder, cinnamon, nutmeg, ginger, and salt.
Wet ingredients: In a separate large bowl, combine pumpkin puree, sugar, eggs, oil, and vanilla until smooth. Stir in the sourdough discard.
Combine: Gradually add the dry ingredients to the wet mixture and mix until combined.
Add chocolate chips: Gently fold in the chocolate chips.
Bake: Pour the batter into the prepared loaf pan and bake for about 50-60 minutes, or until a toothpick inserted comes out clean.
Tip:
Let the bread cool before slicing for the best texture. Slather it with butter or enjoy on its own!
Holding on is believing that there’s only a past; letting go is knowing that there’s a future.
The Harvest
Hello there!
I hope that you are doing well and are finding ways to bring joy into your everyday life. I am hopeful that as we move into a new season we can settle into a sense of calm and peace. The shift to fall can sometimes move us from the chaos that summer sometimes brings to a more grounded way of being.
The Autumn Equinox is a time of letting go and also harvesting the good that is abundant in our lives while also allowing the stalks and leaves to fall aside and go back to the Earth. With this beautiful and colorful season emerging it is our time to loosen our grip on the focus of growth and prepare to move into a more dormant season. This is also a great time to look at the cycles of life; seasons, months, breath, and even life.
We know that with each ending there is a beginning, in whatever shape that takes—self awareness, growth, wisdom, letting go, etc. We see this so easily in the changing of leaves–the amazing color that emerges following a season of bounty, and then the ease in which the leaf lets go. Watch as they effortlessly fall to the ground to be taken into the loving arms of Mother Earth for the new growth that waits for the next season.
I have been recently thinking that it has been such a challenging time for me since my last major hip surgery. Through that process I have changed so much. I no longer am pushing my body in the ways I once did. Rather I am enjoying the pace that my body wants to go at. I enjoy slower walks and have learned a little bit about being at ease instead of extreme activity. Sure, sometimes I miss the hard push up a mountain or the thrill of kickboxing, but through these past months of recovery I have certainly learned about letting go. And that has been a good thing.
I encourage you to go outside. Take a breath. Take time to look at letting go of what no longer serves you. Thank it for its time in your life as the teacher it is and then release it.
Finally, welcome the harvest that is within and always look for opportunities to be grateful. I know for myself, the practice of gratitude has lead me into a life of awareness that has enhanced my life everyday. Let the practice of acknowledging gratitude for all that you have become.
Life is really good, friends.
Blessings, Stacie
Essential Oils & Wellness
Many of you know that I use and rely on essential oils to maintain the health of my mind, body, and spirit. I use them throughout my home from cleaning, for pain management, energy, sleep, mood and much more. One of my favorite things is helping others get started using natural remedies and plant medicine.
You will also get an awesome welcome package from me, access to my VIP community group, education and mentoring and much more. It is easy to get started! I am also happy to chat personally with you to find the perfect options for your needs.
I offer FREE wellness consultations to talk about your goals and desire for a healthier, mind, body and spirit. Together we will create a personalized plan. Schedule yours today!
This ultra grounding blend is a fan favorite. It is all about being grounded and soaking up that forest floor aroma. The result is a calm mind and a super chill feeling. Plus, the petrified wood stones are soooooo pretty!
Cost: $22
Recipes & DIY
Did you know you can use essential oils to add flavor and health benefits to your recipes?? Fall is such a great season for warm, inviting and soul-feeding foods. Check out some of my favorites below.
I have one more batch of marigold body butter left from my summer growing and blending. Marigold’s are in the family of calendula and both support skin and inflammatory responses in the body. Plus it is luxurious. Let me know if you’d like a jar. $25
Peach Jam
Finally, I have PEACH JAM for sale. Let me know if you’d like a jar of this tasty treat. It pairs wonderfully with fresh sourdough bread, but let’s not get crazy, right? $5
Fall Diffuser Blends
I love the smell of fall and these diffuser blends which not just smell great, but your family will benefit from the healthy supports essential oils add when used aromatically.
YOGA
Online LIVE classes
Following my 30 Days of Yoga (you can find everyday on my Youtube Channel), I decided to offer at least one LIVE ONLINE class. This month I am offering a RESTORATIVE class on 9/18 at 6:30pm. You will simple need a quiet space, some pillows and this link!! The passcode is yoga.
My YouTube channel has continued to grow and you can find all kinds of videos there. Everything from chair yoga to restorative to traditional classes. Plus, you’ll find some bonus stuff, too!
This format is one of my most popular and loved! Just click on the link below and you’ll have access to the online class. Donations are appreciated. If you need samples of essential oils to fully enjoy the practice, just reach out to me.
Are you a current yoga teacher? I am also offering a yoga teacher mentoring program to help yoga teachers learn how to modify and teach to those with different abilities. Ask me more!
Life Lessons from an Autumn Leaf
We know change is coming, so we embrace its beauty for all the world to see. It’s exciting when my friends and I all begin to turn colors. I can imagine its much like when humans get their hair done or change their style of clothing. You just feel brand new, hot, beautiful–a sight to be seen, for sure. When most of us receive our new colors, and a few begin to fall, the humans come out by the droves. I’ve watched so many walking hand-in-hand. I’ve heard many intimate conversations and often witness family portraits. Children ooh and ah about the wonder of our change, and the whole world seems to take a second glance to admire our new look.
However, as the cold winds begin to blow, we know we must hold on tight to our branches until it’s our time to fall. It’s interesting because none of us want to drop. We just want to stay in our spot, high above the ground and admire the magnificent atmosphere fall brings.
1. Radiate Beauty. Autumn brings an abundance of fall colors and textures. The reds, oranges, yellows, golds and rust tones of autumn delight the senses in landscapes and rich sunsets, inspiring poets and visual artists. Take the time to radiate your own beauty and creativity to the world.
2. Connect with Your Shadow. After the long, bright sunlit days of summer, autumn brings earlier sunsets and longer shadows. It’s an ideal time for thoughtful introspection and shining the light of awareness on our own shadow parts.
3. Let Go. Trees willingly and naturally shed their leaves after putting on a radiant fall show of colors. Is there anything in your life that’s ready to be released? Enjoy the brilliance of all that has ripened and come to fruition, but be willing to let go; it will pave the way for new beginnings.
4. Save for Lean Times. Even as birds and woodland creatures are enjoying the abundance of fall, they are also storing away portions of their autumn harvest and preparing for leaner times. Enjoy the blessings of the season, but remember to plan for the future.
5. Find Balance. In a world of duality, balance is key. The autumn equinox signals equal amounts of night and day, serving as a reminder to find balance in our own lives.
Autumn is a study in contrasts, and the result is a rich, multi-sensory experience. Apply these five lessons from autumn in your own life, and drink in the bounty of this inspiring time of year.
Thank You
So many of you have been so supportive of me for over 17 years! I am so blessed that I can continue to share my passion and touch your life. It means a lot to me that you know that you are very important to me, and I am incredibly grateful that our paths have crossed. I believe that now more than ever, we need to recognize the people and meaningful connections that we all have.
As always, it is my hope that you stay healthy and happy in your mind, body and spirit.
There’s something magical about lilacs in bloom as their fragrance catches on the breeze like a memory, soft and sweet, reminding us that beauty often arrives in the smallest moments.
Every spring, I find myself drawn to their delicate clusters—not just for their scent, but for the way they mark time. A fleeting season, a familiar rhythm, a sign that warmer days are finally here.
This year, I decided to capture a bit of that fleeting magic in a jar.
Making lilac jelly feels like bottling up spring. It’s subtle, floral, and just a touch old-fashioned—in the best possible way. Whether you’re new to floral jellies or a seasoned forager, this recipe is a lovely way to honor the season.
How to Make Lilac Jelly
First things first
Gather the blooms from your lilac bush
Pluck about 4 cups of flowers off the stems
Pour boiling water over the flowers to make a tea
I added a handful of blueberries to deep then color
Let it sit for 24 hours. You can keep it in the fridge up to 5 days if needed
Now you are ready
Get a large pot of boiling water or a water canning pot
Prepare your jars by heating them in the boiling water
Add the strained tea to a separate pot
Add 2 tablespoons lemon juice
Add 1/3 cup powdered pectin
Stir to remove clumps
Boil for one minute
Add 3 cups of sugar (one cup at a time)
Bring to a boil for one minute
Set aside for one minute, skimming off any foam
Let’s can the jelly
Scoop jelly into prepared jars
Wipe the edge of the jars and add lid and finger tight ring
Place in water bath for 10 minutes
Set jars aside somewhere to cool undistrubed
Can be stored up to one year (if they last that long)
How awesome is that? There is still time to make your own if you still have lilac blooms! Hurry, go!
There’s a quiet kind of joy in spreading something homemade onto warm toast, especially when it carries the scent of lilacs and the memory of spring mornings. Plus the pink color is just so amazing.
This jelly is more than just a sweet treat—it’s a way of slowing down, noticing what’s blooming, and savoring what won’t last forever.
Whether you gift it, save it, or spoon it straight from the jar, may it remind you to pause and find beauty in the simple things.
These sourdough discard chocolate chip cookies are so good! The sourdough gives them moisture and a bit of tangy goodness.
I’ve been making sourdough bread for about six months and have mastered a few of the discard recipes like banana muffins, waffles, English muffins and crackers. If you aren’t sure what I am talking about the “discard” is the stuff you would throw away when feeding your starter—I keep mine in a jar in the fridge so when I get the push to bake something, I have extra for some fun recipes.
I am a huge fan of cookies but rarely make them because I have zero self control when it comes to cookies. Thankfully I have a house full of people coming this weekend who will gobble these up in no time.
Sourdough Discard Chocolate Chip Cookies Recipe
*This recipe requires you to chill the cookie dough for at least 2 hours FYI! Don’t skip this step because it will help your cookies bake up the best!
Ingredients:
• 1 3/4 + 1 Tablespoon all-purpose flour
• 1 tsp. salt
• 1/4 tsp. baking soda
• 1/2 tsp. baking powder
• 1 large egg
• 1/2 cup sourdough discard
• 1 tsp. vanilla extract
• 1 stick of butter
• 1/2 cup light brown sugar
• 1/2 cup white sugar
• 1 1/2 cups of semi-sweet chocolate chips (butterscotch chips are great, too!)
How to Make Sourdough Discard Chocolate Chip Cookies
1. In a large bowl mix all your dry ingredients. Use a fork to whisk together the flour, baking soda, baking powder and salt and then set aside.
2. In a separate smaller bowl, mix together the egg, sourdough discard and vanilla. Set aside.
3. In a mixer add your cold, cubed butter and both the brown and white sugar. Beat on low-speed until the mixture forms small crumbles. This shouldn’t take more than 1 minute. Add the chocolate chips and mix for another 30 seconds. You can also hand mix just make sure everything gets incorporated well.
4. Add all your dry ingredients and mix on low-speed for about 30 seconds or a few minutes by hand. Once the dough begins to pull away from the bowl, you’re good! Don’t over mix.
5. Make small balls of dough either with a cookie scoop or a large spoon. Place on a parchment paper lined cookie sheet. Put cookie sheet in the refrigerator for at least 2 hours. I have also used a mini muffin pan like this, or in a pinch for time made cookie bars using a baking pan like this.
6. Bake for 15 minutes at 375 degrees or until golden brown.
If you happen to have any left, you can store in an air tight container and these also freeze really well. I also love to give a little gift to others using this cute boxes you can write a special message on.
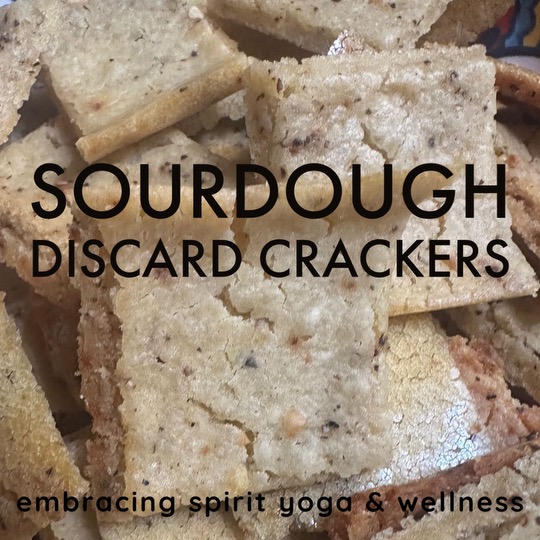
Ever since I shared some sourdough discard crackers over on my instagram I have had a zillion questions about them. If you haven’t jumped into the sourdough craze you are definitely missing out. I will admit that at first it seemed like a LOT of work and time, but it really isn’t. I mean how much time do we spend mindlessly scrolling when we could spend a tiny bit of time eliminating garbage from our diet and making something soulful and delicious?
Before I share the super simple cracker process, let’s chat about sourdough.
What is sourdough?
Sourdough relies on a mix of wild yeast and lactic acid bacteria, rather than baker’s yeast, to leaven the dough. It’s richer in nutrients, less likely to spike your blood sugar, contains lower amounts of gluten, and is generally easier to digest than bread made with baker’s yeast.
Store bought bread has so many ingredients in it and most of them are useless ingredients that just add junk to our food. Homemade sourdough is flour, water, salt. Three ingredients compared to over twenty in a store bought version. Hmmm.
By using a special starter of wild yeast and bacteria, the positives of consuming sourdough far outweigh the negative ideas that we should be avoiding bread. Sourdough bread is a baking art form that is, by its very nature, a healthier choice – according to A Bread Affair in Vancouver here are the reasons why…and have to agree 100%.
The Benefits of Sourdough:
1. It is easy to digest.
The bacteria-yeast composition will start to breakdown the starches found in the grains before it even reaches your stomach. That means there is way less work to be done, making it much easier on your gut.
2. It has a lower glycemic index.
Compared to many other types of bread, sourdough is fermented in a way that depletes bad starches within it. This means that it won’t cause your blood sugar to rise so drastically upon eating it.
3. Better for gluten-sensitivity.
The longer prep time for sourdough bread means that much of the protein gluten is broken down into amino acids before you consume it. The extensive soaking, rinsing, and other preparation steps means that it is easier to eat and digest, especially if you have mild sensitivities to gluten.
4. More “good acid”.
Lactobacillus a kind of bacteria found in sourdough bread more so than other types of bread and it results in higher levels of lactic acid. This is important because it means there is less room for phytic acid, which can be potentially dangerous. Larger quantities of lactic acid also result in easier digestion and accessibility to more minerals.
5. Provides healthy bacteria.
Sourdough bread is fermented in a way that fosters more beneficial bacteria in the bread and in your body when you eat it.
6. Less yeast.
Healthy bacteria in sourdough bread works to reduce yeast populations, so the likelihood of infection and/or overgrowth is substantially lower.
7. Natural origins.
Sourdough bread made with whole flour, wild yeast and bacteria comes from a very “natural” origin. It is the oldest form of leavened bread; we have been eating it as part of a natural diet for a long, long time.
8. Fewer preservatives.
Sourdough bread contains acetic acid, which naturally prevent the growth of mold. It naturally preserves itself, meaning that toxic preservatives are not required to make it last. So it won’t go bad – and you can opt out of the hazardous build-up of preservatives in the food supply chain.
9. Good fuel.
Made from wheat, sourdough bread fuels the production of good bacteria in your gut – much like the inulin and oligosaccharides found in onions, leeks, bananas, garlic, asparagus, and so on.
10. It’s nutritious.
Sourdough contains a variety of vitamins and nutrients, making it super beneficial to your day-to-day health. Sourdough bread has small to moderate amounts of: iron, manganese, calcium, B1-B6, B12, folate, zinc, potassium, thiamin, niacin, riboflavin, selenium, iron, manganese, magnesium, phosphorus, and vitamin E. What a great selection! Compared to other breads, sourdough maintains many of the original nutrients that are processed out of other kinds of bread.
11. The taste!
Sourdough bread tastes great on top of being a healthier alternative. What more could you want?
Crackers?? You got it! I also use sourdough to make all kinds of fun things like pizza dough, pancakes, cookies and this weekend I am making English muffins!
First, you’ll need some sourdough “starter”. This consists of flour and water that becomes the base for your bread and other baked goods.
Simply put: a sourdough starter is a live fermented culture of fresh flour and water. Once combined, the culture will begin to ferment and cultivate the natural yeasts found in our environment. A small portion is added to your bread dough to make it rise. Commercial yeast IS NOT required.
The Process of Sourdough:
At first I felt overwhelmed with having to “feed” something and initially wondered if I had a new child to worry about but realized I was way over thinking it.There are some sourdough people out there that measure everything to to the gram and while that does produce a perfect loaf, after awhile you do learn to eyeball things, especially feeding the starter. I usually just pour some out into my discard jar and add 1/2 cup flour and 1/4 cup water and call it good for the week. The day before I bake bread I do feed her a twice so she is extra happy.
For crackers, cookies, muffins, pizza dough and so much more you’ll need some of the “discard”.
Sourdough discard is the unfed portion of your sourdough starter that you remove before you add fresh flour and water. Because of its unfed state, it’s not used to bake the delicious bread you know as sourdough, but more often than not, used in sourdough discard recipes like crackers!
There are a zillion recipes out there but after a few times following one you might learn to wing it like me.
Sourdough Discard Crackers
Preheat the oven to 325 degrees.
In a small mixing bowl add 2-3 tablespoons of olive oil or melted butter. To this add seasonings you love. I have been adding Trader Joe’s 21 Seasoning Salutewhich is a smooth blend of onion, black pepper, celery seed, cayenne pepper, parsley, basil, marjoram, bay leaf, oregano, thyme, savory, rosemary, cumin, mustard, coriander, garlic, carrot, orange peel, tomato, lemon juice and lemon oil. The perfect savory flavor!
After combing the seasonings and oil, add 2 cups of sourdough discard and mix well.
Sprinkle Himalayan Pink Salt on top
Pour mixture onto a baking sheet lined with parchment paper
Bake for 10 minutes and then score into bite size squares with a pizza wheel
Bake an additional 20-30 minutes or until crispy and golden brown
I store these once cooled in a sealed container or jar (if they last that long)
Other combinations include parmesan cheese and rosemary or making an Italian herb blend flavor. Some people love the everything bagel flavor but I find smelling like garlic for days to be a slight downside. I saw someone also make cinnamon sugar crackers that were cut slightly smaller for a cereal type snack!
You might be able to see how this can easily become a part time obsession and finding new ways to use the discard is constantly fun.
Stacie believes that it is her life purpose to share the gift of Yoga with anyone who is willing to say yes. In addition to raising a family and being an advocate for those with disabilities, Stacie is founder of Embracing Spirit Yoga which specializes in bringing adaptive Yoga into community centers and rehabilitation clinics. Bringing her depth of compassion to the mat–or the chair–she offers students the opportunity to grow as an individual in all aspects of their life.
I am a tad late to the sourdough bread frenzy but now that I am all in, it’s been so fun. I have seen so many people explain why to eat sourdough bread and I just didn’t get it. Until I did.
I have never been a big sandwich or bread eater so it’s more of a hobby than a homestead mission. My loaves may not be the perfection instagram worthy photo yet, but they taste delicious and work for my family.
Why bake/eat sourdough bread?
There are so many benefits to sourdough. Plus, it is so fun to make and the extra goodies that you can bake make it so versatile.
Here are my top 20 reasons:
Prebiotics: Sourdough fermentation increases the availability of prebiotic fibers, which promote healthy gut bacteria and aid digestion.
Reduced Gluten Content: Fermentation breaks down some gluten proteins, making them easier to digest for individuals with mild gluten sensitivities.
Enzyme Activity: The fermentation process activates enzymes in the sourdough, which help break down complex carbohydrates and proteins, aiding digestion.
Phytic Acid Reduction: Sourdough fermentation reduces phytic acid, a compound that can impair mineral absorption and cause digestive discomfort.
Improved Nutrient Absorption: Sourdough fermentation enhances the body’s ability to absorb important nutrients like iron, zinc, and magnesium.
Lower Glycemic Index: Sourdough bread has a lower glycemic index than regular bread, resulting in more stable blood sugar levels and sustained energy.
Acetic Acid: The acetic acid produced during sourdough fermentation can improve digestion by supporting the production of digestive enzymes.
Lactic Acid Production: Lactic acid produced in sourdough fermentation supports healthy gut bacteria and aids digestion.
Alleviation of Digestive Disorders: Some individuals with digestive disorders, such as irritable bowel syndrome (IBS), report improved symptoms when consuming sourdough bread.
Increased Mineral Bioavailability: Sourdough fermentation increases the bioavailability of minerals present in the bread, making them easier for the body to absorb and utilize.
Reduced FODMAPs: The fermentation process of sourdough helps break down fermentable carbohydrates, reducing their presence in the final bread product and making it more tolerable for individuals with FODMAP sensitivities.
Reduced Antinutrients: Sourdough fermentation reduces antinutrients like phytates and lectins, which can interfere with digestion and nutrient absorption.
Balanced Acid-Base Ratio: Sourdough bread has a more balanced acid-base ratio, reducing the risk of acid reflux and indigestion.
Improved B-vitamin Production: Sourdough fermentation increases the production of B-vitamins, which play a crucial role in digestion and overall health.
Enhanced Flavor: The complex flavors developed during sourdough fermentation can stimulate the production of saliva and digestive enzymes, aiding digestion.
Extended Fermentation: Longer fermentation times commonly used in sourdough baking allow more thorough breakdown of proteins and starches, making the bread easier to digest. 48 hours is optimal for cold retarding in the fridge.
Natural Preservatives: Sourdough contains naturally occurring preservatives like acetic and lactic acids, which help prevent spoilage and promote digestive stability.
Reduced Additives: Sourdough bread often uses fewer additives and preservatives compared to commercially produced bread, making it easier on the digestive system.
Milder Wheat Allergy Symptoms: Some individuals with wheat allergies report milder symptoms when consuming sourdough bread due to the fermentation process altering the proteins.
Personal Digestive Tolerance: While these reasons generally suggest that sourdough bread is easier to digest, individual tolerance can still vary based on specific digestive issues and personal sensitivity
Credit to Dr Dawn M. O’Brien Taylor
I have tried many sourdough recipes but have found this simple one to be my fave:
100g of “starter” *tons of how to make out there. It takes patience or a friend who has a healthy starter.
300g of all purpose flour
500g water
10g salt
I feed my little starter and wait for it to double (usually 3-4 hours). When it has I add it to the mixing bowl, add the water flour and salt, and mix with a danish wisk until shaggy or 30 minutes. Then every 30 minutes I stretch and fold the dough (this is where the magic happens). I do four sets of folds. Then I plop it back into the oven on the proofing setting for about 2-3 hours. If your oven doesn’t have that setting, place bowl on the counter covered up and it will take more like 5-6 hours of bulk proofing.
Once it is doubled in size, then remove it from the bowl to a floured surface. Fold the dough like an envelope and then roll the entire envelope into a log shape, then to make it a circle begin dragging it along counter to seal the seams and create a perfect round. Toss into a banneton basket and close seam by pinching. Place into your refrigerator covered for up to 3 days! This method I have found in my busy life works the best because I can let it cold ferment in fridge until I am ready then bake. I usually mix on Friday and bake on Sunday.
It’s peach heaven here in Colorado. I know you hear about Georgia peaches but a Colorado a Palisade Peach is a forerunner in the peach world.
This is summer’s favorite dessert, so naturally, it pairs perfectly with any and all of your go-to summer bbq dishes and blanching and freezing peaches is so easy. In the deepest part of cold winter you’ll be glad you did!
You may have eaten a peach cobbler or something called a cobbler, but what is it really? Is it a type of fruit pie, cake, crisp, or buckle? Or a combination? One thing is for sure, peach cobbler recipes really aren’t that complicated, and I’m here to end the confusion. Plus you basically dump, mix and bake.
Cobblers can be both a dessert or savory baked dish, topped with a biscuit-type batter that may be sweet, savory, or cake-like. The batter is dropped in spoonfuls over fresh, frozen, preserved fruits or savory fillings. When baked, the golden topping has a “cobbled” appearance, ergo, a cobbler!
Traditionally peach cobblers, crisps, and crumbles are freeform desserts without a bottom crust. Although some peach “cobbler” recipes resemble a thick-crusted, deep-dish pie with both a top and bottom “crust,” similar to a buckle. This comes out like a light cake-like crust surrounding the filling, and it’s truly to die for.
Easy Peach Cobbler Recipe Ingredients
Peaches – fresh sliced peaches or frozen, gently thawed, and thoroughly drained. (Save that juice and make Peach Sangria!)
Unsalted Butter – is preferred in this peach cobbler recipe. If you only have salted on hand, it’s still a go!
Flour – this recipe uses all-purpose flour. Be sure to use the scoop and smooth method when measuring out flour.
Granulated White Sugar
Baking Powder – Baking powder loses its potency rather quickly, and your recipe won’t rise properly if it’s too old. You can test your baking powder for freshness. Simply, pour a little baking powder into hot water — if it fizzes, it’s still good to use!
Salt
Milk – I always prefer whole milk unless specified in a recipe. The butter fat content adds to the richness factor of baked goods.
Egg
Vanilla Extract – warms and enhances the sweetness with soft vanilla and nut notes.
Cinnamon & Nutmeg – sing with aromatic, woody spice harmony in homemade peach cobbler!
Brown Sugar
Ice Cream For Serving – optional but highly recommended for old fashion peach cobbler recipes to be served à la mode.
Ingredients
2 cups peeled peaches (if frozen, thaw and drain juice)
1/4 cup butter
1/2 cup flour
1 cup sugar (divided)
1 teaspoon baking powder
1/4 teaspoon salt
1/3 cup milk
1 egg
1/4 tsp vanilla
1/2 teaspoon cinnamon
1/4 teaspoon nutmeg
1/4 cup brown sugar
ice cream for serving (optional)
How To Make Homemade Peach Cobbler
Heads up, fellow peach cobbler lovers! Do Not Stir the ingredients when you layer them in the baking dish!
Step 1. Melt butter in a 9-inch glass dish while the oven preheats.
Step 2. Mix flour, sugar, baking powder, and salt in a large bowl, then stir milk and egg into the flour mixture.
Step 3. Pour batter into the glass baking dish over melted butter. – Do Not Stir
Step 4. In a separate bowl, dump sugar, vanilla, cinnamon, and nutmeg over peaches; fold/stir to combine.
Step 5. Spoon peaches gently over the batter. – Do Not Stir
Step 6. Sprinkle brown sugar over the top of the peaches and batter.
Bake homemade peach cobbler for 40-45 mins or until peaches are bubbly and the cobbler crust is golden brown.
I committed this week to finding a new recipe to try because I am over the same ol’ dinners. Working full time and basically being in my car for the entire day means my eating suffers. It’s rare that I actually eat before the afternoon and by then I am starving. I will say though I have been better about trying to have easy things to eat while on the go like my mindful muffins, protein balls or breakfast cookies.
Anyway, dinners mean a lot in my world and I look forward to eating a solid dinner every night. I just am so tired of the same things so when I saw this in a similar version, I decided to go for it since I have an abundance of tomatoes and fresh mozzarella is just so good.
This Caprese Stuffed Chicken is made with juicy chicken stuffed with tomato slices, mozzarella cheese, fresh basil, balsamic and herbs, topped with balsamic and pan-seared then baked to perfection.
This is an incredibly easy dish, made even easier if you’re using a skillet. It’s a simple meal on any weeknight but I decided fancy enough to serve the next time guests come over. I whipped it up in no time and the results were amazing.
I served this with a fresh salad and dinner was done.
HOW TO MAKE THIS STUFFED CHICKEN RECIPE
•Preheat the oven and slice each chicken breast horizontally most of the way through the breast. Start with the thickest part first, being careful not to slice all the way through. You want to create a pocket.
•Place tomato slices, mozzarella slices, and basil leaves inside each breast and close with toothpicks. Place them in diagonally to help keep the filling in. Sprinkle each chicken breast with salt, basil, and oregano and heat olive oil in a non-stick pan or cast-iron skillet.
•Once the pan is hot, sear chicken breast on each side. When flipping to the other side be careful to avoid spillage! If you are not using a cast iron pan, place chicken into a casserole dish. If you are, leave them in there and place directly in the oven when ready.
•Bake at 350 degrees for 45 minutes
• Drizzle with a store bought balsamic glaze (or make your own with balsamic vinegar and brown sugar)