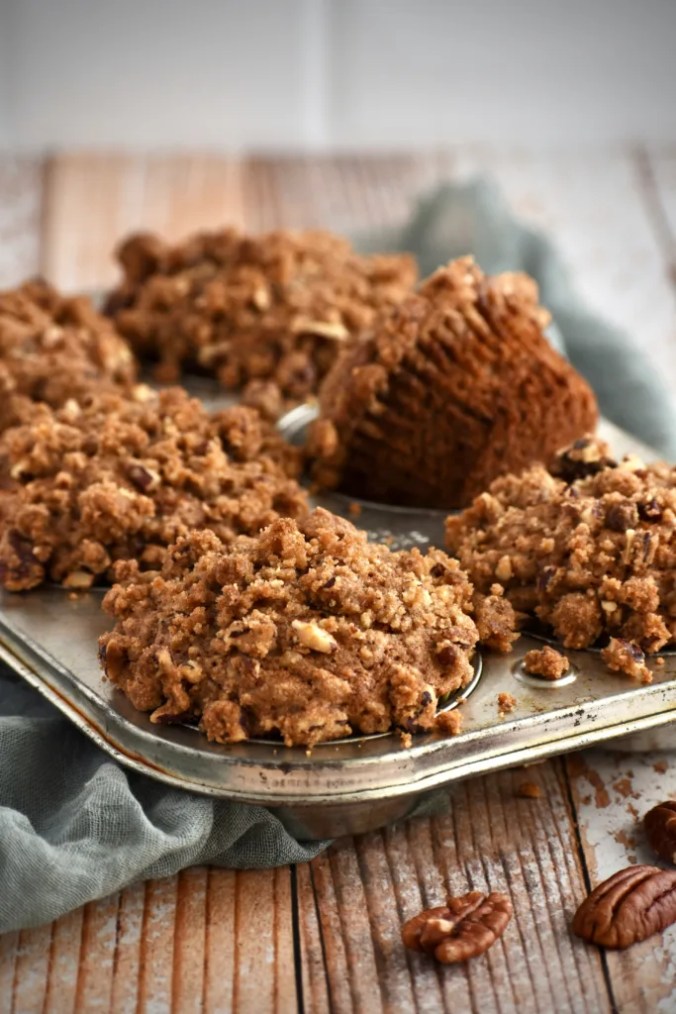
Easy Sourdough English Muffins (no oven needed)

Easy Sourdough English Muffins

Makes: 8–10 muffins
Fermentation Time: Overnight (8–12 hours)
Cook Time: 15–20 minutes

A Simple and Delicious Sourdough Treat

If you’re looking for a gentle entry into sourdough baking, these easy sourdough English muffins are the perfect place to start. With just a few pantry staples and an overnight ferment, you’ll wake up to dough that’s ready to cook into golden, soft, and delightfully tangy muffins.

They’re perfect for breakfast sandwiches, a quick snack with jam, or toasted with a bit of butter and honey. No oven required—just a skillet or griddle and a bit of patience.


Ingredients

  • 1 cup (240g) active sourdough starter (fed and bubbly)
  • 1 cup (240g) milk (dairy or non-dairy)
  • 2 tablespoons (28g) melted butter or olive oil
  • 2 tablespoons (25g) sugar or honey
  • 2 ½ cups (300g) all-purpose flour
  • ¾ teaspoon salt
  • Cornmeal or semolina for dusting

Instructions

The Night Before:

  1. In a large bowl, mix together:
    • 1 cup sourdough starter
    • 1 cup milk
    • 2 tablespoons melted butter or olive oil
    • 2 tablespoons sugar or honey
    • 2 ½ cups all-purpose flour
  2. Stir until a shaggy dough forms. Cover and let rest for 30 minutes.
  3. After resting, add ¾ teaspoon salt and knead it in by hand or with a stand mixer.
  4. Cover the bowl with a lid or plastic wrap and allow it to ferment overnight at room temperature (8–12 hours), or until doubled in size.

In the Morning:

  1. Turn the dough out onto a floured surface. Gently pat it to about ¾ inch thickness.
  2. Use a 3-inch biscuit cutter or the rim of a glass to cut out muffins.
  3. Place the rounds on a parchment-lined baking sheet dusted with cornmeal. Sprinkle more cornmeal on top.
  4. Cover with a towel and let rise for 30–60 minutes, until slightly puffy.

To Cook:

  1. Preheat a skillet or griddle over medium-low heat. Do not grease the pan.
  2. Gently transfer the muffins to the skillet. Cook for 5–6 minutes per side, adjusting the heat as needed to prevent burning. Muffins should be deep golden and cooked through.

Tips for Success

  • Use a thermometer to check doneness—internal temp should reach 200°F (93°C).
  • For a soft interior and signature English muffin texture, split them with a fork instead of slicing with a knife.
  • Store in an airtight container for up to 4 days, or freeze for longer storage.

Why Sourdough?

Sourdough offers more than just incredible flavor. It’s a gut-friendly, fermented grain that can be easier to digest than conventional breads. The long fermentation process helps break down glutenincrease nutrient availability, and naturally leavens the dough without commercial yeast. These English muffins are a great way to enjoy all the benefits of sourdough in a manageable and beginner-friendly recipe.


Final Thoughts

There’s something truly satisfying about crafting your own English muffins from scratch—especially when your sourdough starter gets to shine. These muffins are simple enough for everyday baking and special enough to share.

Let me know in the comments if you try them, and feel free to tag me on social media with your delicious results. Happy baking!

If you love my content and want more tools for mindfulness & movement, check out my digital products on Buy Me a Coffee! Your support helps me continue creating. 

Looking for the tools and products I swear by? Visit my Amazon storefront for a handpicked collection of my favorite finds—from kitchen gadgets to wellness essentials. Click here to explore and shop my must-haves.

If you would love to be part of my essential oil community and are ready to start using pure essential oils, shop here or email me for a free 1:1 consultation.

No-Bake Peanut Butter Protein Bites

No-Bake Peanut Butter Protein Bites
A fun, healthy, protein-packed snack to fuel your day

There’s something so satisfying about a bite that’s equal parts creamy, crunchy, and just a touch sweet—and that delivers a burst of energy when you need it most. These no-bake peanut butter protein bites have become my go-to snack for everything from mid-afternoon pick-me-ups to pre-yoga fuel. They’re super simple to make, infinitely adaptable, and keep in the fridge for up to a week (if they last that long!).


Ingredients

  • 1 cup creamy peanut butter (or any nut/seed butter you love)
  • ½ cup old-fashioned oats
  • ½ cup vanilla or unflavored protein powder
  • 2–3 tbsp honey or maple syrup (adjust for sweetness)
  • 1 tbsp chia seeds or ground flaxseed (optional boost of fiber)
  • 2 tbsp mini dark chocolate chips (or cacao nibs)
  • A pinch of sea salt

Instructions

  1. Combine base ingredients:
    In a medium bowl, stir together peanut butter, oats, protein powder, chia seeds (if using), and sea salt.
  2. Sweeten & mix:
    Drizzle in honey or maple syrup, one tablespoon at a time, stirring after each addition, until the dough is slightly sticky but holds together when pressed.
  3. Add mix-ins:
    Gently fold in the chocolate chips or cacao nibs.
  4. Form the bites:
    Use a small cookie scoop or spoon to portion out about 1–1½ tablespoons of dough. Roll into a ball between your palms, pressing gently to keep the surface smooth.
  5. Chill:
    Place the bites on a parchment-lined tray and chill in the refrigerator for at least 30 minutes to firm up.
  6. Enjoy!
    Store in an airtight container in the fridge for up to 1 week, or freeze for longer storage.

Variations & Tips

  • Almond Joy: Swap peanut butter for almond butter and add shredded coconut.
  • Double Chocolate: Use chocolate protein powder and roll bites in cocoa powder.
  • PB&J Remix: Mix in freeze-dried raspberries or chopped dried cherries.
  • Seed Power: Add a tablespoon of pumpkin or sunflower seeds for extra crunch.

Why You’ll Love Them

  • Protein-packed: Perfect for muscle recovery or a sustained energy boost.
  • No-bake & easy: Ready in under 10 minutes, no oven required.
  • Customizable: Swap nut butters, mix-ins, or sweeteners to suit your taste.

Give these little power balls a try this week—stash them in your bag, on your desk, or next to your yoga mat for a wholesome treat whenever you need it.

What mix-in will you try first? Let me know in the comments! I am going for the coconut ones!

If you love my content and want more tools for mindfulness & movement, check out my digital products on Buy Me a Coffee! Your support helps me continue creating.

Healthy German Chocolate Mini Cakes (Gluten-Free, Dairy-Free, Refined Sugar-Free)

Healthy German Chocolate Mini Cakes (Gluten-Free, Dairy-Free, Refined Sugar-Free)

There’s something about German Chocolate Cake that feels so rich, nostalgic, and soulful. Today, I’m sharing a healthier spin on the classic — Healthy German Chocolate Mini Cakes — made with wholesome ingredients you can feel good about. These little cakes are gluten-free, dairy-free, and sweetened naturally, but still capture the decadent flavor you know and love.

Perfect for a cozy afternoon treat, a mindful celebration, or just because… these mini cakes bring all the comfort without the sugar crash.

Ingredients

For the Cakes:

  • 1 cup almond flour
  • 1/3 cup coconut flour
  • 1/2 cup unsweetened cocoa powder
  • 1 teaspoon baking soda
  • 1/4 teaspoon sea salt
  • 3 large eggs
  • 1/2 cup pure maple syrup (or honey)
  • 1/2 cup unsweetened almond milk (or oat milk)
  • 1/3 cup melted coconut oil (or avocado oil)
  • 2 teaspoons vanilla extract
  • 1 teaspoon apple cider vinegar (helps the cakes rise beautifully)

For the Coconut-Pecan Frosting:

  • 1/2 cup full-fat coconut milk (from a can)
  • 1/4 cup pure maple syrup
  • 1/2 teaspoon vanilla extract
  • 1/2 cup chopped pecans
  • 1/2 cup unsweetened shredded coconut

Instructions

  1. Preheat your oven to 350°F (175°C). Lightly grease a mini cake pan or line a standard muffin tin.
  2. In a large bowl, whisk together the almond flour, coconut flour, cocoa powder, baking soda, and salt.
  3. In a separate bowl, mix the eggs, maple syrup, almond milk, melted coconut oil, vanilla extract, and apple cider vinegar until well combined.
  4. Add the wet ingredients to the dry and stir until a thick batter forms.
  5. Spoon the batter into your prepared pan, filling each cavity about two-thirds full.
  6. Bake for 15–18 minutes, or until a toothpick inserted into the center comes out clean. Let cool completely on a wire rack.
  7. While the cakes are cooling, make the frosting:
  8. In a small saucepan over medium heat, combine the coconut milk and maple syrup.
  9. Simmer gently for 5–7 minutes, stirring often, until slightly thickened.
  10. Remove from heat and stir in the vanilla extract, pecans, and shredded coconut.
  11. Once the cakes are cooled, top each one generously with the coconut-pecan frosting.
  12. (Optional but delightful) — Drizzle with melted dark chocolate or sprinkle extra chopped pecans on top!

Tips and Notes

  • This recipe yields about 10–12 mini cakes if using a standard muffin tin, or about 6–8 cakes if you’re using a 3-inch mini cake mold.
  • These little cakes freeze beautifully! Simply freeze them individually and thaw at room temperature when you’re ready to enjoy.
  • For an even lower sugar option, you can substitute monk fruit maple syrup or another low-glycemic sweetener.

Why You’ll Love These Mini Cakes

These Healthy German Chocolate Mini Cakes are rich in chocolate flavor, naturally sweet, and filled with that classic coconut-pecan goodness — but without the heaviness of traditional versions. They’re a beautiful reminder that nourishing yourself can still feel indulgent and celebratory.

A sweet little treat for any moment when you need a little extra joy.

If you love my content and want more tools for mindfulness & movement, check out my digital products on Buy Me a Coffee! Your support helps me continue creating. 

Lemon & Strawberry Oat Bars

Lemon & Strawberry Oat Bars
Welcoming spring one sweet bite at a time.

There’s something so simple and sacred about baking with seasonal ingredients—especially when they bring brightness and joy into your kitchen. These Lemon & Strawberry Oat Bars are the kind of recipe that feels like a love letter to spring. They’re soft, golden, just the right amount of sweet, and filled with the zing of lemon and the goodness of strawberries.

Baking can be such a grounding, heart-opening ritual. As you stir and pour, layer and bake, you’re not just making food—you’re creating nourishment, comfort, and care. Whether you share them with loved ones or savor them solo with a warm cup of tea, I hope these bring a little sunshine into your day.

Spring calls for something sweet, light, and bursting with brightness. These Lemon & Strawberry Oat Bars are like sunshine you can taste—easy to make, naturally sweetened, and the perfect blend of tangy and comforting.

Made with fresh strawberries, zesty lemon, and wholesome oats, this treat is perfect for an afternoon snack, picnic, or simple celebration of the season. They’re gluten-free and can be made vegan with a few swaps.


Ingredients

For the base and topping:

  • 1 ½ cups rolled oats
  • 1 cup almond flour (or oat flour)
  • ? cup coconut sugar or brown sugar
  • ½ tsp baking soda
  • ¼ tsp sea salt
  • Zest of 1 lemon
  • ? cup coconut oil or melted butter
  • 1 tsp vanilla extract
  • 2 tbsp maple syrup

For the strawberry filling:

  • 1 ½ cups chopped fresh strawberries
  • Juice of 1 lemon
  • 1 tbsp maple syrup
  • 1 tbsp chia seeds (to thicken)

Instructions

  1. Preheat your oven to 350°F (175°C) and line an 8×8 baking dish with parchment paper.
  2. Make the filling: In a small saucepan, combine strawberries, lemon juice, and maple syrup. Cook over medium heat until the berries break down and get jammy (about 8–10 minutes). Stir in chia seeds and set aside to cool and thicken.
  3. Make the base/topping: In a large bowl, mix oats, almond flour, sugar, baking soda, salt, and lemon zest. Stir in coconut oil, vanilla, and maple syrup until the mixture is crumbly but holds together when pressed.
  4. Press about ? of the oat mixture into the bottom of the pan. Spread the strawberry filling evenly over the top. Sprinkle the remaining oat mixture over the strawberries and gently press it down.
  5. Bake for 25–28 minutes or until the top is golden. Let cool completely before slicing into bars.

? A Few Tips

  • You can use frozen strawberries—just thaw first and drain any excess liquid.
  • For a vegan version, use coconut oil or vegan butter.
  • These bars store well in the fridge for up to 5 days (if they last that long!).

Mindful Moment:

While the bars bake, take a moment to sit with a cup of tea and breathe in the aroma filling your kitchen. Gratitude lives in these quiet, simple rituals—the scent of lemon zest on your fingers, the sweetness of strawberries, the warmth of the oven.

Let this be a small celebration of the season and your own sweetness.

If you love my content and want more tools for mindfulness & movement, check out my digital products on Buy Me a Coffee! Your support helps me continue creating.

Lemon Blueberry Sourdough

There’s something deeply grounding about mixing, folding, and baking. Since my surgeries, the kitchen has become more than just a space to prepare food—it’s become a place of presence and peace. When I bake, especially something bright and nurturing like this Lemon Blueberry Sourdough, I feel a connection to the rhythm of life again. The rising dough, the pop of juicy berries, the zest of lemon—it’s all a quiet reminder that healing takes time and joy can be found in simple rituals.

This loaf is subtly sweet, naturally leavened, and absolutely bursting with flavor. The combination of tart lemon and fresh (or frozen!) blueberries gives a burst of spring in every bite. Whether you’re baking to share or simply to nourish your own heart, this one’s a favorite.

Lemon Blueberry Sourdough Recipe

Ingredients:

  • 100g bubbly, active sourdough starter
  • 375g warm water
  • 500g bread flour (you can use a mix of all-purpose and bread flour too)
  • 10g salt
  • Zest of 1 large lemon
  • 1 cup fresh or frozen blueberries (toss in a bit of flour to prevent sinking)
  • Optional: 1 tbsp honey or maple syrup for a touch more sweetness

Instructions:

  1. Mix: In a large bowl, combine starter and water. Stir in flour until fully incorporated. Cover and rest (autolyse) for 30 minutes.
  2. Add Salt + Lemon Zest: Sprinkle salt and lemon zest on top of dough. Gently fold in until evenly mixed.
  3. Bulk Fermentation: Over the next 4–5 hours, perform stretch and folds every 30–45 minutes. Add blueberries gently during the second fold to avoid crushing them.
  4. Shape + Cold Proof: Shape your dough and place it in a floured banneton. Cover and refrigerate overnight (8–12 hours).
  5. Bake: Preheat oven to 475°F with Dutch oven inside. Score your loaf and bake covered for 20 minutes, then uncovered for another 20–25 minutes until golden brown.
  6. Cool: Let your loaf rest at least 1 hour before slicing (the hardest part!).

? A Gentle Reflection

As the loaf rises, so do we. Through setbacks, surgeries, uncertainty, and slow healing—rituals like baking remind us that care and consistency matter. I hope this lemon blueberry loaf brings some sunshine to your day and a sense of steadiness to your week.

If you make this recipe, I’d love to see it! Tag me on social media and let me know how yours turned out.

If you love my content and want more tools for mindfulness & movement, check out my digital products on Buy Me a Coffee! Your support helps me continue creating. 

Rustic Sourdough Strawberry Pie

Rustic Sourdough Strawberry Pie (AKA: Sourdough Discard Strawberry Galette)

There’s something magical about taking a humble sourdough discard and turning it into a buttery, flaky crust for a rustic strawberry pie. This recipe is the perfect way to use up that leftover starter while indulging in the sweet, tangy goodness of fresh strawberries. With a touch of vanilla and a hint of lemon zest, this rustic sourdough strawberry pie is sure to steal the show at your next gathering.

The best part? It’s as easy as it is delicious—no fancy pie pan required, just a bit of love and a whole lot of flavor!

Crust Ingredients:

• 120g all-purpose flour

• 113g unsalted butter, cold and cubed

• 1 tbsp sugar

• ½ tsp salt

• 60g sourdough discard (unfed)

• 1–2 tbsp ice water, as needed

Filling Ingredients:

• 2 cups fresh strawberries, hulled and sliced

• 2 tbsp sugar (adjust to taste)

• 1 tbsp cornstarch or arrowroot powder

• ½ tsp vanilla extract

• Zest of half a lemon (optional)

Topping:

• 1 egg, beaten (for egg wash)

• Coarse sugar for sprinkling

Instructions:

1. Make the crust:

• In a bowl or food processor, mix flour, sugar, and salt.

• Cut in the cold butter until it resembles coarse crumbs.

• Add sourdough discard and mix until combined. If dry, add a little ice water until the dough comes together.

• Shape into a disk, wrap, and chill for 30–60 minutes.

2. Make the filling:

• Toss strawberries with sugar, cornstarch, vanilla, and lemon zest. Let sit for 10 minutes.

3. Assemble the galette:

• Preheat oven to 400°F (200°C).

• Roll out dough on parchment into a rough circle (about 12 inches).

• Pile strawberry mixture in the center, leaving a 2-inch border.

• Fold edges over the filling, pleating as you go.

• Brush crust with egg wash and sprinkle with coarse sugar.

4. Bake:

• Bake for 35–40 minutes, until golden brown and bubbly.

• Cool slightly before slicing.

Whether you’re baking for a special occasion or just treating yourself to a slice of homemade comfort, this rustic sourdough strawberry pie is a guaranteed crowd-pleaser.

The combination of tangy sourdough crust and sweet, juicy strawberries creates a balance of flavors that’s simply irresistible. So go ahead, grab a fork, and savor every bite of this delightful, seasonal treat. After all, good things—like this pie—are meant to be shared and enjoyed.

Happy baking!

If you love my content and want more tools for mindfulness & movement, check out my digital products on Buy Me a Coffee! Your support helps me continue creating. 

Healthy Lemon Bliss Bars

Healthy Lemon Bliss Bars (Gluten-Free & Naturally Sweetened)

Spring is the perfect time to refresh and renew—not just in our surroundings but also in the way we nourish our bodies. As the days grow warmer and brighter, lighter, citrus-infused treats feel like a celebration of the season. One of my favorite ways to embrace this fresh energy is with a healthy take on a classic lemon dessert. These Healthy Lemon Bliss Bars are naturally sweetened, gluten-free, and bursting with bright, tangy flavor—perfect for an afternoon treat or a guilt-free indulgence. Let’s welcome spring with a dessert that’s as vibrant and refreshing as the season itself!

Ingredients:

For the crust:

  • 1 cup almond flour
  • 1/4 cup coconut flour
  • 1/4 cup melted coconut oil
  • 3 tbsp pure maple syrup or honey
  • 1/2 tsp vanilla extract
  • Pinch of salt

For the lemon filling:

  • 3 eggs
  • 1/3 cup fresh lemon juice (about 2 lemons)
  • Zest of 1 lemon
  • 1/4 cup pure maple syrup or honey
  • 1 tbsp coconut flour (helps thicken)
  • 1/2 tsp vanilla extract
  • Pinch of salt

Instructions:

  1. Preheat & prepare: Preheat oven to 350°F (175°C) and line an 8×8-inch pan with parchment paper.
  2. Make the crust: In a bowl, mix almond flour, coconut flour, melted coconut oil, maple syrup, vanilla, and salt. Press the mixture evenly into the pan and bake for 10-12 minutes, until lightly golden. Let it cool slightly.
  3. Prepare the lemon filling: In another bowl, whisk together eggs, lemon juice, lemon zest, maple syrup, coconut flour, vanilla, and salt until smooth.
  4. Bake: Pour the lemon mixture over the pre-baked crust and return to the oven for 18-20 minutes, until the filling is set but still slightly soft in the center.
  5. Cool & chill: Let the bars cool completely, then refrigerate for at least an hour before slicing.
  6. Serve & enjoy: Dust with a little coconut flour or powdered monk fruit for a classic look, then slice and enjoy!

These bars are refreshing, lightly sweet, and perfect for spring! 

If you love my content and want more tools for mindfulness & movement, check out my digital products on Buy Me a Coffee! Your support helps me continue creating.

Triple Berry Sourdough Scones

These Triple Berry Sourdough Scones are a perfect way to use up extra sourdough discard while creating a flaky, buttery treat bursting with juicy berries. The sourdough adds a subtle tang, beautifully complementing the sweetness of the berries.

Enjoy them fresh with a drizzle of glaze or a dollop of clotted cream!

Ingredients:

  • 2 cups (250g) all-purpose flour
  • 1/4 cup (50g) granulated sugar
  • 1 tbsp baking powder
  • 1/2 tsp salt
  • 1/2 cup (113g) unsalted butter, cold and cubed
  • 1/2 cup (120g) sourdough discard (unfed is fine)
  • 1/3 cup (80ml) heavy cream (plus more for brushing)
  • 1 large egg
  • 1 tsp vanilla extract
  • 1/2 tsp lemon zest (optional, for brightness)
  • 1 cup mixed berries (blueberries, raspberries, and chopped strawberries – fresh or frozen)

For the Glaze (Optional):

  • 1/2 cup powdered sugar
  • 1-2 tbsp lemon juice or milk

Instructions:

  1. Preheat & Prepare:
    • Preheat your oven to 400°F (200°C).
    • Line a baking sheet with parchment paper.
  2. Mix Dry Ingredients:
    • In a large bowl, whisk together the flour, sugar, baking powder, and salt.
  3. Cut in the Butter:
    • Using a pastry cutter or your fingers, cut the cold butter into the flour mixture until it resembles coarse crumbs.
  4. Mix Wet Ingredients:
    • In a separate bowl, whisk together the sourdough discard, heavy cream, egg, vanilla, and lemon zest.
  5. Combine & Add Berries:
    • Gently stir the wet ingredients into the dry ingredients until just combined.
    • Carefully fold in the berries, being mindful not to overmix.
  6. Shape & Cut:
    • Turn the dough onto a lightly floured surface and gently shape it into a 7-8 inch round disc.
    • Cut into 8 wedges and transfer them to the prepared baking sheet.
  7. Bake:
    • Brush the tops with a little heavy cream for a golden finish.
    • Bake for 18-22 minutes, or until golden brown and set.
  8. Glaze & Serve:
    • If using, mix the glaze ingredients and drizzle over the scones once they’ve cooled slightly.
    • Serve warm and enjoy!

If you love my content and want more tools for mindfulness & movement, check out my digital products on Buy Me a Coffee! Your support helps me continue creating. 

Strawberry Scones

Springtime Strawberry Scones: A Fresh & Fluffy Delight

As the days grow warmer and the first signs of spring emerge, it’s the perfect time to bring fresh, seasonal flavors into the kitchen. These Strawberry Scones are light, buttery, and bursting with the sweet-tart flavor of juicy strawberries. Whether enjoyed with a cup of tea on a sunny morning or as a delightful afternoon treat, these scones embody the essence of spring.

What makes these scones so special? They are made with frozen strawberries, a touch of lemon zest for brightness, and just the right amount of sweetness. The secret to achieving the perfect texture—flaky on the outside, tender on the inside—is using cold butter and a gentle touch when mixing the dough. Using frozen strawberries keeps the dough cold which is key for scone making and you can stock up when they are on sale.

Why You’ll Love These Scones:
 Seasonal Goodness – Strawberries add natural sweetness and a pop of color and feel like spring!
 A Hint of Citrus – Lemon zest enhances the fruity flavors and adds a refreshing zing.
Buttery Perfection – Cold butter creates a flaky, melt-in-your-mouth texture.
Perfect for Any Occasion – Enjoy them at brunch, as a snack, or with your favorite tea.

For an extra indulgence, drizzle them with a simple glaze or serve with clotted cream and jam. I love a tiny bit of lemon in my glaze. These homemade scones are a celebration of spring, bringing a little sunshine to your table with every bite.

Here’s a delicious Frozen Strawberry Scone recipe! .

Strawberry Scones Recipe

Ingredients:

  • 2 cups (250g) all-purpose flour
  • 1/4 cup (50g) granulated sugar
  • 1 tbsp baking powder
  • 1/2 tsp salt
  • 1/4 cup (113g) unsalted butter, very cold and shredded
  • 1/2+ cup frozen strawberries, chopped
  • 1/2 cup heavy cream or half and half
  • 1 large egg
  • 1 tsp vanilla extract

Optional Glaze:

• 1/2 cup powdered sugar

• 1 tbsp milk or lemon juice

Directions:

Combine the dry ingredients in a medium size bowl. Grate your frozen butter directly into the dry mixture. Using your clean hands or a pastry cutter to create pea size crumbles of butter in the dry mixture. In a small bowl combine the wet ingredients. Make a well in the middle of the dry mixture and pour the wet ingredients into it. Using a spatula gentle stir without overtaxing.

The mixture will be somewhat dry and crumbly, don’t add more liquid. Turn onto a slightly floured surface and knead gentle to form a ball. Press into a disk shape and using either a bench scraper to cut wedges, or use a small round cutter for a round shape. If using this option, press the extra dough into a a disk again to keep using the round cutter.

Place wedges or rounds onto a parchment lined baking sheet. Preheat the oven to 400 degrees. While the oven is heating, place the baking sheet with scones into your freezer to keep cold. Once the oven is hot, bake for 20-22 minutes, or until the edges are slightly browned. Allow to cool and when cool, drizzle glaze onto scones.

Enjoy!

If you love my content and want more tools for mindfulness & movement, check out my digital products on Buy Me a Coffee! Your support helps me continue creating. 

Cinnamon Swirl Sourdough Discard Banana Bread

If you’re looking for a delicious way to use up your sourdough discard, this Cinnamon Swirl Sourdough Discard Banana Bread is the perfect solution. It combines the natural sweetness of ripe bananas with the tangy depth of sourdough discard and a cozy cinnamon swirl. This moist, flavorful loaf is ideal for breakfast, a snack, or even dessert.

Why You’ll Love This Recipe

  • Uses Sourdough Discard – A great way to reduce waste while adding a subtle tangy depth to your baked goods.
  • Incredibly Moist & Flavorful – Thanks to the bananas, sourdough discard, and buttery cinnamon swirl.
  • Perfect for Any Time of Day – Enjoy it with morning coffee, as an afternoon treat, or warmed up for dessert.

Ingredients

For the Banana Bread:

  • 3 ripe bananas, mashed (about 1 cup)
  • ½ cup sourdough discard (unfed)
  • ½ cup unsalted butter, melted (or coconut oil)
  • ¾ cup brown sugar (or coconut sugar)
  • 2 eggs, room temperature
  • 1 tsp vanilla extract
  • 1 ¾ cups all-purpose flour (or whole wheat for a heartier loaf)
  • 1 tsp baking soda
  • ½ tsp salt
  • ½ tsp cinnamon

For the Cinnamon Swirl:

  • ¼ cup brown sugar
  • 1 tbsp cinnamon
  • 1 tbsp melted butter
  • optional add a sprinkling of oats for texture

Instructions

  1. Preheat & Prepare:
    • Preheat your oven to 350°F (175°C).
    • Grease and line a 9×5-inch loaf pan with parchment paper.
  2. Mix Wet Ingredients:
    • In a large bowl, whisk together the mashed bananas, sourdough discard, melted butter, brown sugar, eggs, and vanilla until smooth.
  3. Combine Dry Ingredients:
    • In a separate bowl, whisk together the flour, baking soda, salt, and cinnamon.
  4. Mix Batter:
    • Gradually mix the dry ingredients into the wet ingredients until just combined. Do not overmix.
  5. Prepare Cinnamon Swirl:
    • In a small bowl, mix brown sugar, cinnamon, and melted butter.
  6. Assemble the Bread:
    • Pour half the banana bread batter into the loaf pan.
    • Sprinkle half of the cinnamon swirl mixture over the batter.
    • Pour the remaining batter on top and swirl in the remaining cinnamon mixture with a knife or toothpick.
  7. Bake:
    • Bake for 50-60 minutes, or until a toothpick inserted in the center comes out clean.
    • Let the bread cool in the pan for 10 minutes before transferring to a wire rack.
  8. Enjoy!
    • Slice and serve warm with butter, honey, or even a drizzle of maple syrup.

Tips for the Best Banana Bread

  • Use Overripe Bananas: The riper the bananas, the sweeter and more flavorful the bread will be.
  • Don’t Overmix: Overmixing the batter can lead to a denser texture.
  • Customize It: Add walnuts, pecans, or chocolate chips for extra texture and flavor.
  • Store It Right: Wrap in plastic wrap or store in an airtight container for up to 4 days at room temperature or freeze for longer storage.

This Cinnamon Swirl Sourdough Discard Banana Bread is the perfect combination of comforting flavors and minimal waste. Whether you’re a seasoned sourdough baker or just looking for a new banana bread twist, this recipe is sure to become a favorite!

Golden Turmeric Latte

Cozy & Nourishing Golden Turmeric Latte

As we transition through February’s chilly days, there’s nothing quite as comforting as a warm, nourishing drink. This Golden Turmeric Latte is not only cozy but also packed with anti-inflammatory benefits, making it perfect for supporting your body—especially if you’re on a healing journey.

Why Turmeric?

Turmeric is a powerhouse spice known for its anti-inflammatory and immune-boosting properties. Curcumin, its active compound, can help reduce pain and inflammation, making this latte a great addition to your daily routine—especially if you’re dealing with recovery, joint pain, or simply the winter blues.

Ingredients:

  • 1 cup milk of choice (almond, oat, coconut, or dairy)
  • 1/2 teaspoon ground turmeric
  • 1/4 teaspoon ground cinnamon
  • 1/4 teaspoon ground ginger
  • 1 teaspoon honey or maple syrup (adjust to taste)
  • 1/2 teaspoon vanilla extract
  • 1 pinch black pepper (enhances curcumin absorption)
  • Optional: 1/2 teaspoon coconut oil (for a creamier texture)

Instructions:

  1. In a small saucepan, warm the milk over medium heat. Do not boil.
  2. Add the turmeric, cinnamon, ginger, black pepper, and coconut oil (if using). Whisk well.
  3. Let it simmer for about 3–5 minutes, stirring occasionally.
  4. Remove from heat and stir in the vanilla and sweetener of choice.
  5. Pour into a mug, sprinkle with a dash of cinnamon, and enjoy!

Variations:

  • Extra Healing: Add a small scoop of collagen powder for added joint support.
  • Spicy Kick: A pinch of cayenne pepper can boost circulation and warmth.
  • Iced Version: Blend with ice for a refreshing golden milk smoothie.

This latte is a simple yet powerful way to support your well-being and embrace the last weeks of winter with warmth and care. Let me know if you try it—I’d love to hear your thoughts! ??


Valentine’s Day Heart-Shaped Sourdough Loaf

There’s something truly special about baking sourdough—it’s a slow, mindful process that transforms simple ingredients into a beautiful, nourishing loaf. This heart-shaped sourdough bread is a perfect way to share love through food, whether for Valentine’s Day, an anniversary, or just because. With its golden, crispy crust and soft, airy crumb, this loaf is not only a treat for the taste buds but also a feast for the eyes.

Sourdough bread has been cherished for centuries, known for its deep flavor, natural fermentation, and gut-friendly benefits. The long fermentation process enhances digestibility while creating a rich, slightly tangy taste that pairs wonderfully with both sweet and savory toppings. This heart-shaped version is a playful twist on a classic, bringing warmth and charm to any table. Whether you’re a seasoned baker or just starting your sourdough journey, shaping your loaf into a heart is a fun and creative way to spread a little extra love. ??

Valentine’s Day Heart-Shaped Sourdough Loaf

Ingredients

  • 500g (4 cups) bread flour
  • 350g (1 ½ cups) water
  • 100g (½ cup) active sourdough starter (fed and bubbly)
  • 10g (2 tsp) salt

Instructions

1. Mix the Dough (Autolyse)

  • In a large bowl, mix the flour and water until combined. Let it rest for 30-45 minutes.
  • Add the sourdough starter and mix well. Let it rest for 20 minutes.
  • Sprinkle salt over the dough and mix until incorporated.

2. Bulk Fermentation (4-6 hours at room temp)

  • Perform stretch and folds every 30 minutes for the first 2 hours.
  • Let the dough rest and ferment until it has risen about 50%.

3. Shaping the Heart

  • Lightly flour your work surface and gently turn out the dough.
  • Pre-shape into a round and let it rest for 20 minutes.
  • To form a heart:
    1. Shape the dough into an oval.
    2. Use your fingers to pinch a small indent at the top center.
    3. Gently elongate and taper the bottom to create a point.
    4. Tuck the sides slightly to enhance the heart shape.

4. Cold Fermentation (Overnight in the Fridge)

  • Place the shaped dough into a well-floured heart-shaped banneton or a bowl lined with a floured towel.
  • Cover and refrigerate overnight (8-12 hours).

5. Baking the Loaf

  • Preheat the oven to 475°F (245°C) with a Dutch oven inside.
  • Place the dough on parchment paper and gently score the heart shape for definition.
  • Transfer to the hot Dutch oven, cover, and bake for 20 minutes.
  • Remove the lid and bake for 15-20 more minutes until golden brown.

6. Cool and Enjoy!

  • Let the loaf cool completely before slicing.