This is everything that is fall! Warmth, coziness, spices and everything apple.
This super simple recipe can be done in an air fryer or a traditional oven — the oven is my personal favorite because the entire house smells like all the amazing fall smells we all love.
Evenly divided the filling between the four apple halves
Bake at 350 degrees for 35-40 minutes or air then at 350 for 13-15 minutes
Top with extra cinnamon and drizzled honey for an added punch
Remember to only use essential oils that are certified pure. One way to tell if they are pure is your bottle will have a supplement facts on the side. If it doesn’t, I wouldn’t recommend taking internally because it is likely not pure and therefore not safe.
Curious the brand I love and trust along with hospitals across the country? Plus they are making a global impact on reducing poverty and building lives for villages and farmers.
Even Starbucks has released their pumpkin lattes already! ?
If you want a healthier version of pumpkin spice creamer… that actually ??BOOSTS?? your immune system instead of destroying it…
Try this yummy DIY Pumpkin Spice Coffee Creamer
Pumpkin Spice Coffee Creamer
Ingredients 1/4 cup Organic Pumpkin Puree 1 Quart Organic Coconut Milk 1 teaspoon Vanilla extract 2 drops Cassia Essential Oil 2 drops Cinnamon Bark EO 2 drops Ginger EO 2 drops Clove EO
Directions •Heat Pumpkin Puree, Coconut Milk, and vanilla on the stove over medium heat for about 5-7 minutes. •Remove from heat and pour into a mason jar or other storage container. •Once partially cooled, add the essential oils. •Shake well before each use!
*hint: Add a few drops of liquid vanilla stevia as sweetener…. for extra yumminess!
Remember the only safe way to ingest essential oils is by making sure they have supplements fact on the bottle. (Store bought essential oils are NOT safe). I choose the proven and tested pure essential oils found here. It is the brand hospital use. Just sayin’.
These oils will make an amazing creamer but they are also powerhouse oils for immunity, oral health, tummy troubles and much more. Plus diffusing this combo is instant fall love. Enjoy this ebook that shows you how versatile essential oils are in your home. Add a wild orange to your cart and you have heaven!
Hot flashes got you down? No matter where you are in the hormone journey, we have all heard of someone struggling with hot flashes. Since I had a complete hysterectomy at age 30, I was in instant menopause. For years I struggled with all of the symptoms, including weight gain and hot flashes.
I found that cleaning up my diet, exercising consistently, the correct hormone replacement (for my body), and using natural remedies like essential oils to be my magic combo. It took many years to find the right combination of healthy living strategies to help me not struggle with the annoying menopause symptoms.
Try this quick cooling spray! I keep this blend on my bedside table and give the back of my neck a little mist before I hit the pillow. I have also made this in a roller blend with fractionated coconut oil and apply down my spine.
20 drops of Peppermint 10 drops Clary Sage 1 TBL Witch Hazel Top with distilled water. Shake and spray when you feel them coming on for a refreshing and cooling sensation.
The extra cool thing about these two oils is they have so many extra benefits like relieving head tension, belly aches, and even support int hair growth! This gorgeous little ebook will show you how versatile essential oils are in your home for you and your family.
With over fourteen years experience, Stacie Wyatt is a E-500 hour Registered Yoga Teacher with Yoga Alliance, Certified Brain Injury Specialist, Life Wellness Coach, Senior YogaFit Instructor, Mind/Body Personal trainer, Stress Reduction and Meditation Instructor, Pilates Instructor, and Barre Instructor. Stacie is also certified in Integrative Movement Therapy™and is also a believer in the power and application of essential oils for health and wellness and proudly shares doTERRA essential oils
I am not a great sit-down-and-eat-a-meal kind of girl, especially during the day. I love a good solid protein rich dinner but my daytime eating is much more like grazing.
I love grabbing a few things I can eat in the car as I travel around to all my assisted living centers to teach yoga. I usually have nuts, grapes and a container of this hummus because it is so easy and so tasty. I usually eat it with veggies or crunchy crackers.
Do you garden? When I first started growing veggies I didn’t have any confidence in my abilities so I started super small. I mostly grew things in pots and it was easy and fun. Each year since then I have expanded into more and more and now have a full size garden that grows many, many things.
There is truly something magical about growing your own food! Today I am going to freeze some beans, make pesto, pickle cucumbers and make salsa! How fun is that?
It is also in gardening that I feel so so connected and relaxed. After a long day of work there is just something so good about getting my hands in my plants, even if it’s just to check the progress. I also have found that still have a tendency to think in terms of scarcity and “not enough” mentality, so I over plant and thinking things won’t grow and end up with a crowded overly abundant garden. In some ways the garden reminds me that that I can continue to work on my thinking and personal development. Also, this year the raccoons have been enjoying digging things up which has been a little frustrating but the bounty is still coming in.
If you have not ever gardened, I say give it a try! A simple google search for you area or a handy book from your local library can get you started!
I have found that not only does spending time with my plants help my stress it also has an array of other benefits.
Planting flowers and vegetables can reap bountiful bouquets and delicious harvests for your dining table. But did you know gardening also can do wonders for your well-being? Here are eight surprising health benefits of gardening. Check this out:
1. Gardening can build self-esteem.
Maybe you don’t think you were born with a green thumb, but after tilling, planting, nurturing and harvesting plants, you might see a slightly different person in the mirror: a person who can grow things and is a little more in tune with the earth.
It always feels good to accomplish new tasks, and if you can grow a garden, what can’t you do?
2. Gardening is good for your heart.
All that digging, planting and weeding burns calories and strengthens your heart.
“There are physical benefits from doing the manual labor of gardening,” says UNC Health internal medicine physician Robert Hutchins, MD, MPH. “It’s hard work to garden, and it provides some cardiovascular benefit.”
3. Gardening reduces stress.
Gardening can help reduce symptoms of depression and anxiety.
“Gardening gives you a chance to focus on something and put your mind to work with a goal and a task in mind,” Dr. Hutchins says, “which is helpful especially now with so much illness and death and talk of death, just to see things growing and things thriving.”
4. Gardening can make you happy.
Getting dirt under your nails while digging in the ground can make you pretty happy. In fact, inhaling M. vaccae, a healthy bacteria that lives in soil, can increase levels of serotonin and reduce anxiety.
5. Gardening can improve your hand strength.
All that digging, planting and pulling does more than produce plants. Gardening also will increase your hand strength. What a great way to keep your hands and fingers as strong as possible for as long as possible.
6. Gardening is good for the whole family.
Gardening can be a solo activity or an opportunity for bonding with your family and friends. The happiness and stress relief that gardening provides is a great thing to share with loved ones. Also, gardening has special benefits for kids. Early exposure to dirt has been linked to numerous health benefits, from reducing allergies to autoimmune diseases. Plus, when they pull a carrot from the ground for the first time you will see pure happiness and awe.
7. Gardening can give you a boost of vitamin D.
A healthy dose of vitamin D increases your calcium levels, which benefits your bones and immune system. Exposure to sunlight helped older adults achieve adequate amounts of vitamin D. Just don’t forget your sunscreen.
8. Growing your own food can help you eat healthier.
If you have a vegetable or herb or fruit garden, you’re getting fresh produce that you know hasn’t been treated with pesticides.
“It’s essentially as farm-to-table as it gets,” Dr. Hutchins says, “if you’re eating what you’re growing.”
Are you ready to start planning next seasons garden?
I know if you are anything like me, nutrition can be put on the back burner especially when we are always so busy.
Today, the standard diet is not what it used to be. There are many factors in play when it comes to food’s depletion of nutrients in the soil to the increase in consumption of highly processed foods.
Proper nutrition supports your body’s natural hormones and keeps them balanced. We are in luck because d?TERRA has us covered with their supplements, the Lifelong Vitality Pack.
LLV, the foundation to your health and wellness, consists of Alpha CRS®+, Microplex VMz®, and xEO Mega®. The ingredients in these 3 products are designed to ensure you are supporting your cells, getting the vitamins and minerals your body needs as well as supplying the fatty acids and other nutrients that are necessary to look and feel your best.
? Sleep better ???? Have more energy ?? Feel more balanced
It is no wonder this is one of d?TERRA’s most popular products! Hormone and total body support at its finest.
By the way, a good friend who lost a good amount of weight, grew back her healthy hair and is feeling better than ever after a divorce last year, said one of her biggest changes was splitting her LLV and taking her morning and afternoon doses separately! I’m starting that tip RIGHT AWAY!
?Do you take LLV every day? Ready to? Did I mention it has a 30 day moneyback guarantee? It’s on day 29 or 30 you don’t feel amazingly better, you can simply return them and get your money back. I’m pretty sure you’re going to love how you feel though. Also, I would like to gift you with a free wellness consultation just for getting started.
I honestly can’t wait until this time of year despite my often endless complaints about the heat. I balance out my intolerance for long summer days of high temperatures with plenty of time to play in my garden and marvel at the bounty of goodness that comes with a little time and patience.
Usually by this time of year I am also getting a little bored with variations of salads so it is always a thrill to find the first few summer squashes or yellow crook neck zucchini’s because one of my favorite summer foods is grilled vegetables. I also love to grill peaches, drizzle with honey and top with fresh ice cream!
I usually pair grilled vegetables with a juicy steak or a grilled chicken breast but these are also delicious just on their own. Simple, fresh and super tasty.
Here is how easy it is:
Preheat an outdoor grill to high heat. (I have also been known to use my indoor grill if I am in a hurry or it is the middle of winter and I am craving some summer flavors). Cut three zucchini or crook neck into thin lengthwise planks. Brush with one tablespoon olive oil and season with salt and pepper. I also love to use garlic salt instead of plain salt. Arrange on the grate with plenty of space between. Grill until tender, lightly charred or about 3-4 minutes per side (unless you’re using an indoor grill that closes it would be just 3-4 minutes total). Transfer to a plate. In a bowl mix together cherry tomatoes and one tablespoon olive oil, apple cider or balsamic vinegar and I love to add some fresh chopped mint or rosemary. Stir up the tomatoes, smash a few for a splash of juice and pour over the grilled veggies.
Did you know that there are ten (eleven when pregnant) glands that make up the Endocrine System?
Our endocrine system and hormones support our bodies from conception through old age.
From conception, the placenta acts as an endocrine organ and produces several important hormones through pregnancy.
Here are some more big hitters:
The Hypothalamus: This is the gland that drives the whole endocrine system by linking our endocrine system with our nervous system.
The Thyroid: This gland is crucial to healthy development and regulates your metabolism.
The Adrenals: This gland is actually made up of two glands: the cortex and medulla. These glands produce hormones in response to stress (cortisol) and regulate blood pressure, glucose metabolism, and the body’s salt and water balance.
The Pancreas – The pancreas is responsible for producing glucagon and insulin. These hormones help regulate sugar (glucose) in the blood.
The Gonads: Ovaries and Testes both produce steroids that affect growth and development and also regulate reproductive cycles and behaviors.
On those hot summer days, when hunger gives way to thirst, there’s nothing that tastes better than a refreshing drink. Smoothies and lemonades are a great way to quench your thirst, plus they help to incorporate more fruits into your diet! Adding a few drops of essential oil will bring an extra twist to the flavour. Here are some simple and tasty ideas to juice up your family’s summer!
Lemon Berry Smoothie
A great start to the day and the perfect breakfast on the go. Berries have countless anti-oxidant properties — plus nutrients and fibre — which help protect your body against seasonal threats.
A great start to the day and the perfect breakfast on the go. Berries have countless anti-oxidant properties — plus nutrients and fibre — which help protect your body against seasonal threats.
Add all the ingredients into a blender and blend on high speed until all ingredients are well combined and smooth.
Serve immediately.
Honey Ginger Lemonade
A twist on classic lemonade, Honey Ginger lemonade is the perfect refreshing drink to help lift your mood. The juiced ginger helps add a little spicy kick, while both lemon juice and Lemon oil keep the recipe light and cool.
Combine all ingredients, except the ice, into a jug. Mix well.
Chill in the fridge until ready to serve.
Serve with some ice cubes.
Raspberry “Lime-onade”
If you are having friends over, then surprise them with a very bright pink “lime-onade”. With only three ingredients, this combination of raspberries and lime is definitely a crowd pleaser.
Add the raspberries to a blender, and blend until smooth.
Press through a fine strainer into a jug, and discard the seeds and pulp. (TIP: You can also put the seeds and pulp in a small jar, cover with vinegar—like white wine or rice wine vinegar—and store mixture in the fridge. Strain later for salad dressings or for marinades).
Add the lime juice, essential oil and water. Stir to combine.
Stir in the honey until combined.
Pour into glasses, and top with ice cubes. Serve and enjoy!
Tropical Smoothie with Tangerine Essential Oil
This tropical smoothie is just like a dessert (a healthy one!) that will make you forget your sweet cravings. Omega-3, fibre and potassium are just a few of the benefits you will pour in your glass.
Ingredients
1 cup (230ml) of organic coconut milk
4 tbsp Greek yogurt
1 banana
1 tbsp of ground flaxseed, sunflower and pumpkin seed
Summer time is in full swing and not only is it hot out there, but all the great berries and produce are in full abundance! It’s so fun to eat fresh, sweet and amazing fruits and veggies.
I love summer, but the heat is not my friend. I get easily cranky on hot days and am always looking for a healthy way to cool down. This little snack is a go to for me…I can swipe a piece mid afternoon or as a dessert and not feel guilty at all.
It’s simple to make and tastes amazing. You’ll see I add a few drops of lemon essential oil. Be sure the brand you choose to use in recipes is safe to ingest. Most aren’t and you have to be safe. The lemon oil gives a pop of summertime flavor but is also has amazing health benefits. Peek at this gorgeous ebook to learn more.
HERE IS WHAT YOU’LL NEED:
• Yogurt: Use a full fat yogurt for the best texture and flavor. Vanilla yogurt is a great base to use, but you can use any flavor you like.
• Fruit: Fresh strawberries and blueberries add a great pop of color and it’s a tasty way to get some fruit into your family’s diet. You can make this bark with other fresh fruits like mango, raspberries or kiwi fruit.
HOW TO MAKE YOGURT BARK
1. Before you spread the yogurt evenly over a lined baking sheet, add two drops of lemon essential oil and stir. 2. Top with chopped strawberries. 3. Top with blueberries or any other fruits. I love kiwi! 4. Option to finish with granola and freeze until firm. I usually skip the granola but it does give it a great crunch. 5. Once it is fully frozen, slam on counter and remove pieces. You can also cut into bark shapes if it doesn’t make its own by slamming it. I store in a Tupperware up to three months, but it also never lasts that long.
TIPS FOR MAKING FROZEN BARK
1. Use full fat yogurt. Using yogurt with full fat means that the texture will less likely get icy when frozen. It will also have a better taste that’s more creamy. I have used Greek Style Coconut milk yogurt too and it’s fabulous for the dairy free people. 2. Chop everything small. Small fruits like blueberries work very well here and chopping larger fruits to be about the size of blueberries helps with cutting the bark. Make sure the fruits are not too bulky either so the bark looks flat. 3. Line your baking sheet. This will help to remove the bark easily from the tray, if you don’t line it, the yogurt will freeze to it and it will be really tough to remove. Use parchment or wax paper to line the entire surface of your sheet pan. 4. Allow time for the bark to set. It will take around 3 hours for the bark to fully set in the freezer. Make it the night before to enjoy the next day.
Enjoy!
Follow me for more goodness for the mind, body and spirit.
Ever since I started gardening a few years ago I have gotten a huge thrill out of watching something grow from a tiny seeds into something that sustains me. Nothing beats fresh produce right out of your own garden. I love the constant growth and it is such a good reminder to me of having patience, providing loving presence and attention to something and enjoying the abundance that always comes.
Trying new things has always been one of my strengths. I rarely shy away from learning new skills and when it comes to trying FUN new things, I am all in. I have two really large chokecherry bushes along my back fence and for the last three or four years I have muttered to myself that I should try making chokecherry jelly. Somehow each year that thought remained just a thought.
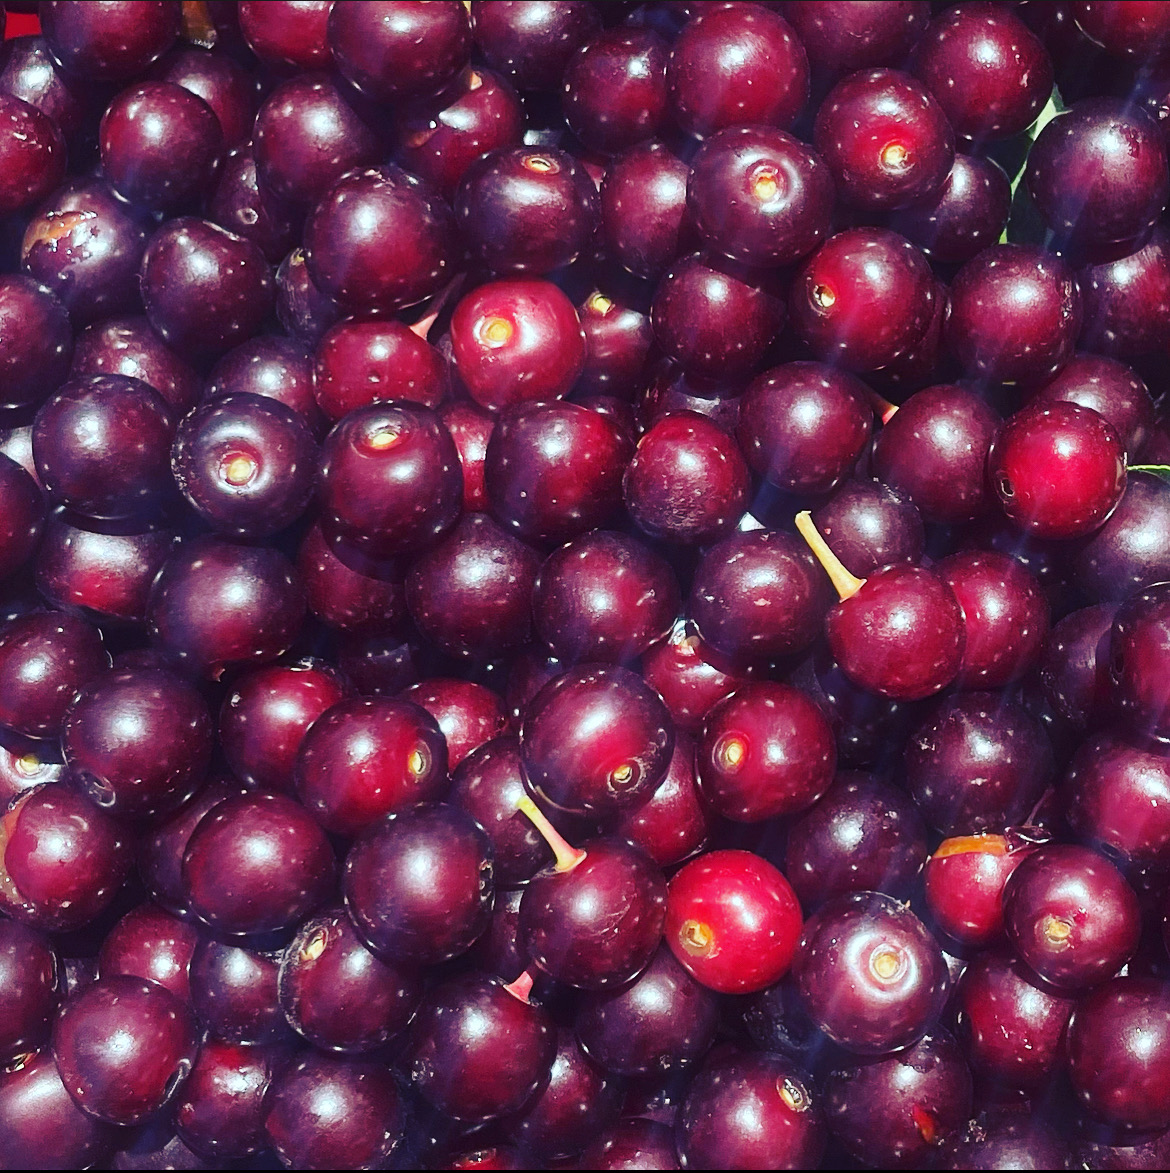
Until this year. Last night I grabbed a bowl and off I went to pick. A great memory I have is my sweet grandmother talking about making chokecherry jelly. While I was picking I felt her spirit as my hands got sticky and red. I had no idea how many cherries I needed to pick to get enough for jelly, but I kept picking. I ended up picking three pint size mason jars and told myself that if it was easy and fun to make jelly, I can always pick more.
Making the jelly was easy and fun. So much so that as soon as my batch was cooling, I took off with a bigger bowl to pick more!
The first thing you do is make the juice. After rinsing and discarding leaves and big stems (don’t worry about the little ones attached to the cherries) cover your cherries with water and boil for 30-35 minutes. You can use this right away for the jelly, or you can freeze it for later. To make the jelly, just follow this simple recipe!
Chokecherry Jelly
Ingredients:
3.5 cups chokecherry juice
1/2 cup fresh lemon juice
1 teaspoon butter or margarine
1 pkg dry pectin 1.75 oz
4 1/2 cups of sugar
Optional—I added two drops of wild orange essential oil! Bam!
Instructions:
Pour juices in kettle.
Add pectin, stir.
Bring to a boil, add sugar.
Boil and stir for 2 minutes.
Remove from heat, skim.
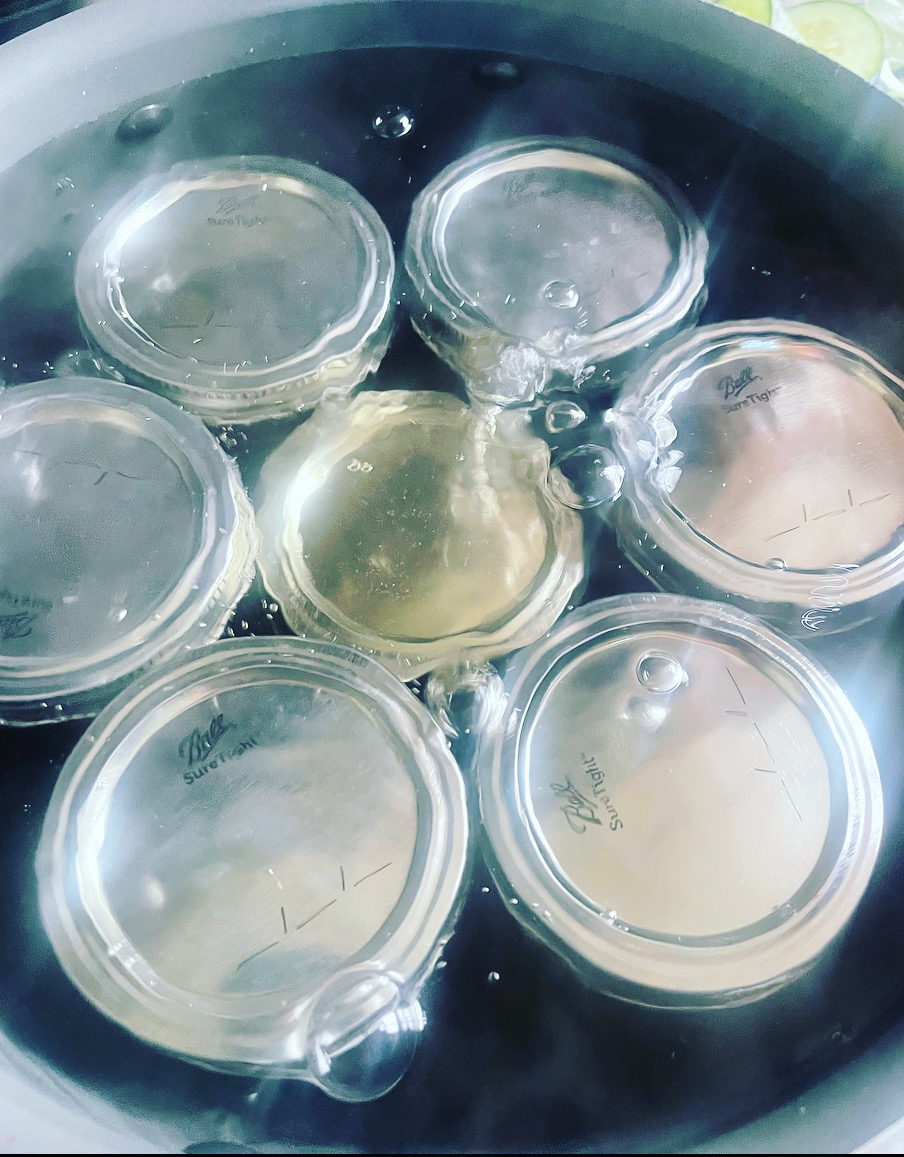
Ladle into jars leaving 1/2 inch space. Add the top and the ring, twist just finger tight (not super tight).
Process in hot water bath for 10 minutes. A hot water bath is when you add filled jars to pot of simmering water that covers the jars.
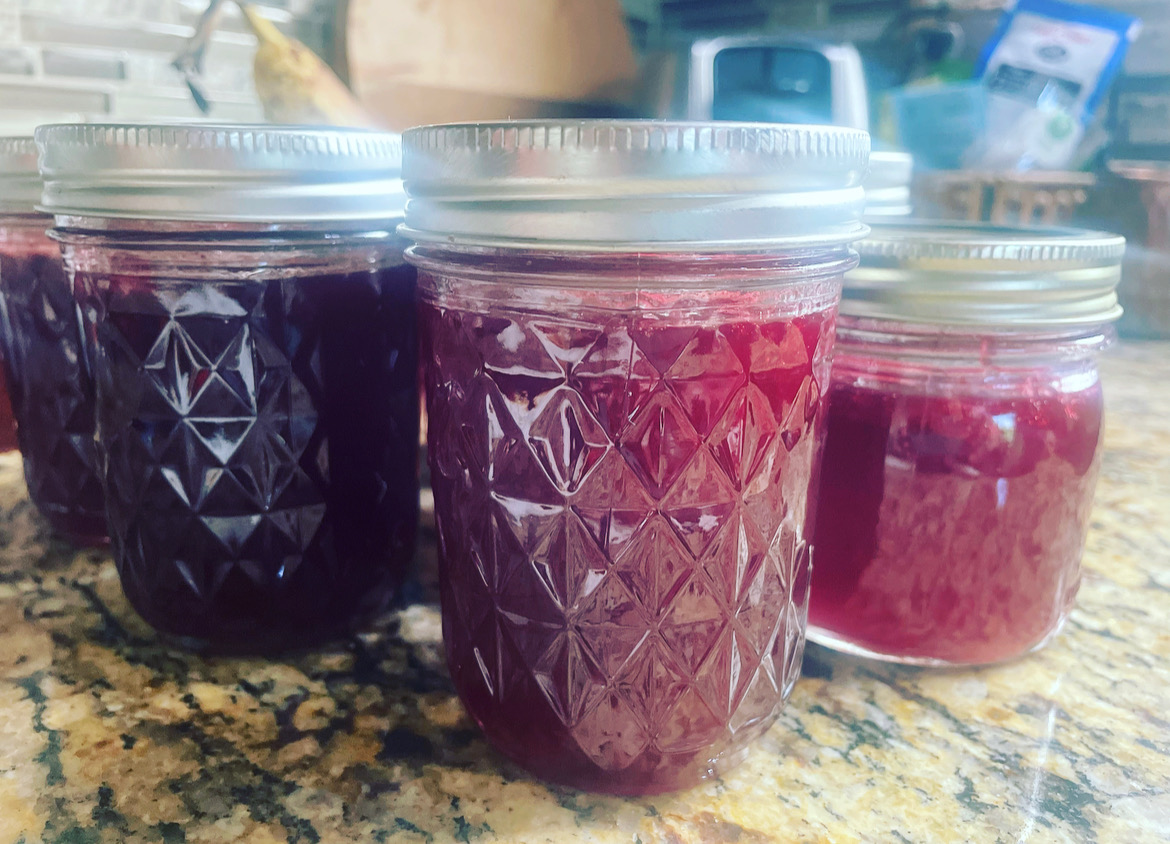
Remove from bath and cool undisturbed for 24 hours.
Besides being fun and easy it is also gorgeous to look at! I cannot wait for a little toast and jelly with my coffee while sitting on the patio tomorrow morning. There is something SO satisfying about making your own food…and even more fun actually picking the ingredients to feed your people. Plus, how amazing will these little jars be for neighbor gifts come holiday time?
** update to original post. After making this two years in a row, I have some measurements that may help. You’ll need approximately 10 cups of berries to yield 4 cups juice. This recipe that calls for 3.5 cups juice yields 7 jars of jelly.
You can find some of my favorite DIY supplies and follow me for more inspiration below!