Valentine’s Day Heart Shaped Whoopie Pies are sure to bring a little love into your world. A heart-shaped red velvet whoopie pie is a soft, cake-like cookie with a vibrant red hue, sandwiching a luscious layer of creamy vanilla filling. The slight cocoa flavor adds richness, while the smooth frosting provides a perfect balance of sweetness. Rolled in festive Valentine’s sprinkles, each bite is a delightful mix of fluffy, moist texture and indulgent creaminess—making it a perfect treat for sharing love and joy.
Ingredients:
For the cookies:
- 2 cups all-purpose flour
- 2 tbsp unsweetened cocoa powder
- ½ tsp baking powder
- ¼ tsp baking soda
- ¼ tsp salt
- ½ cup unsalted butter, softened
- ¾ cup granulated sugar
- 1 large egg
- 1 tsp vanilla extract
- ½ cup buttermilk (1/2 cup milk with 1 tablespoon lemon juice = buttermilk)
- 1 tsp red food coloring (this is my fave natural food coloring)
Ingredients for the filling:
- 4 oz cream cheese, softened
- ¼ cup unsalted butter, softened
- 1 cup powdered sugar
- ½ tsp vanilla extract
For decoration:
- Valentine’s Day sprinkles (no artificial dyes in these)
Instructions:
- Preheat oven to 350°F (175°C). Line a baking sheet with parchment paper.
- Whisk dry ingredients: In a bowl, mix the flour, cocoa powder, baking powder, baking soda, and salt.
- Cream butter & sugar: In a separate bowl, beat the butter and sugar until fluffy. Add the egg and vanilla, mixing well.
- Add buttermilk & food coloring: Alternate adding the dry ingredients and buttermilk, mixing just until combined. Stir in red food coloring until fully incorporated.
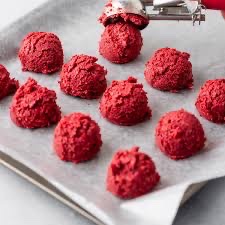
- Pipe heart shapes: Transfer the batter to a piping bag (or a zip-top bag with a corner snipped off). Pipe heart shapes onto the baking sheet.
- Bake for 8-10 minutes until set. Let cool completely.
- Make the filling: Beat cream cheese, butter, powdered sugar, and vanilla until smooth.
- Assemble: Spread or pipe the filling onto the flat side of one cookie, then top with another to make a sandwich.
- Decorate: Roll the edges in Valentine’s sprinkles for extra flair.
- Enjoy!